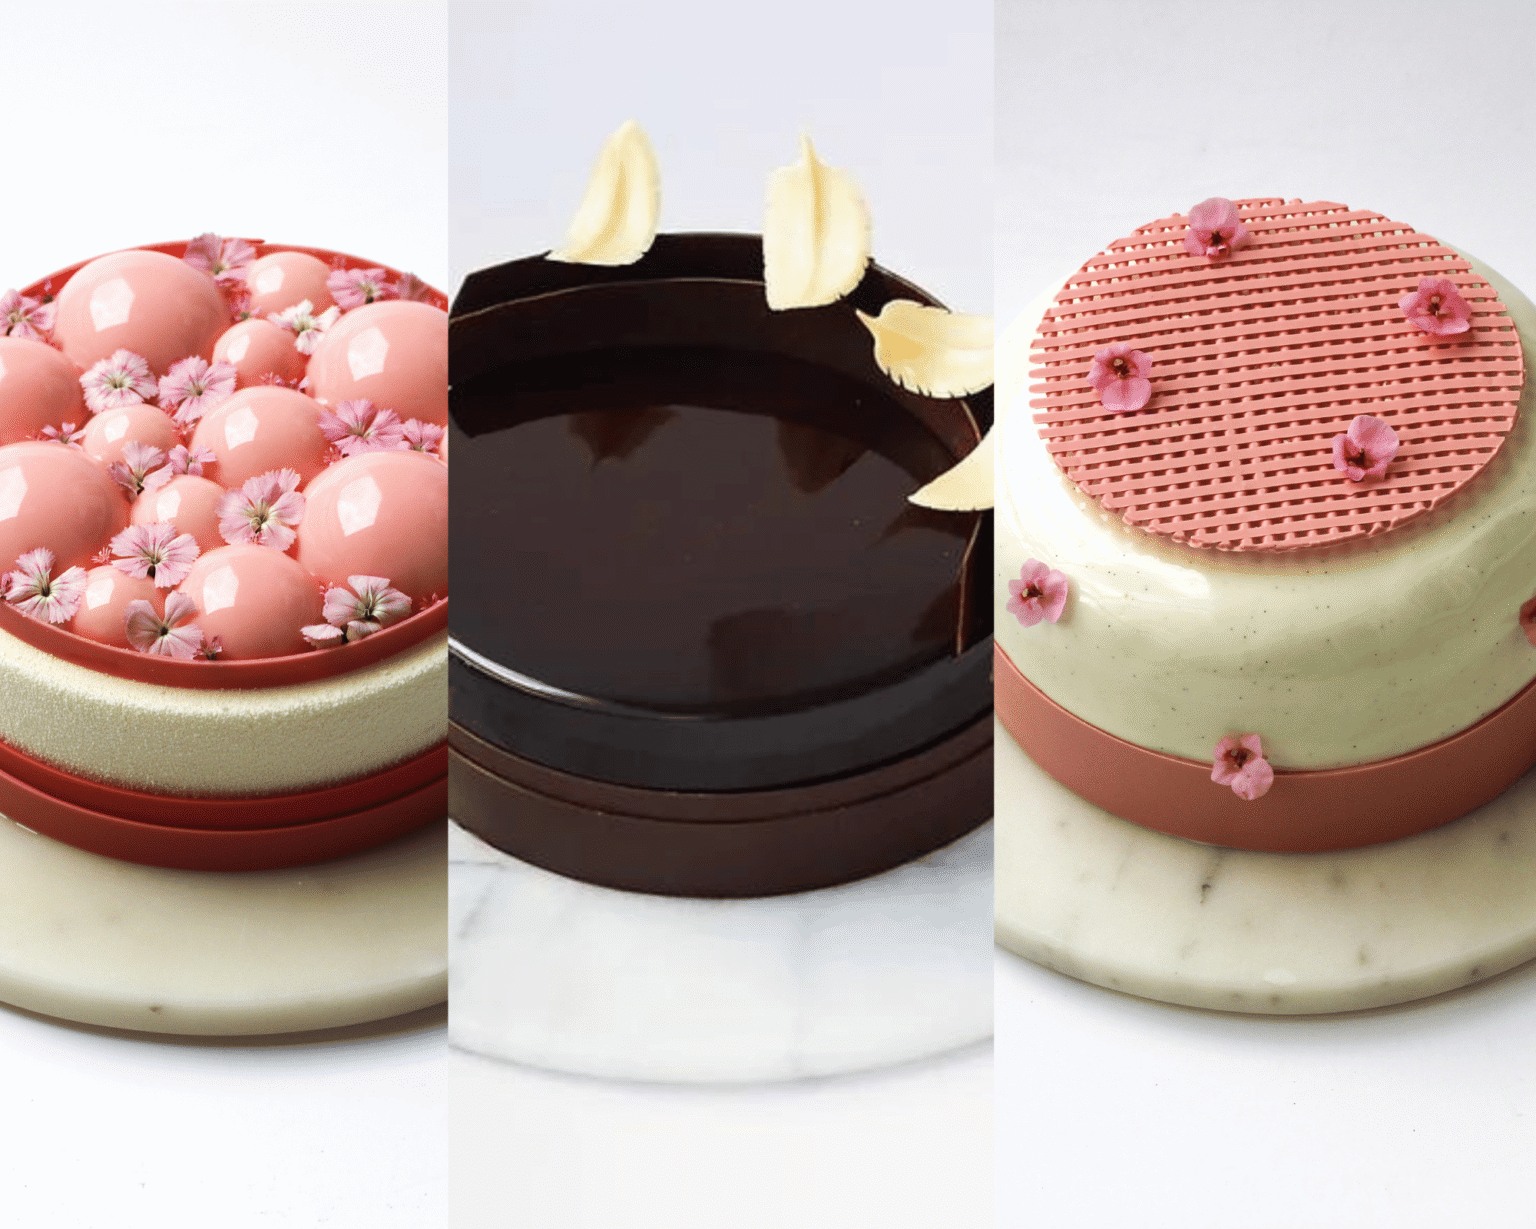
Chocolate tempering can seem a little intimidating at first, but once you understand what’s happening to the chocolate and learn a few simple techniques, it becomes much easier to master.
If you’re looking to learn how to temper chocolate correctly, get more consistent results, or troubleshoot problems you’ve been struggling with, you’re in the right place.
Tempering is essential for creating chocolate decorations with a smooth finish, glossy shine, and crisp snap, and understanding the technique makes it much easier to work with chocolate confidently.
This article will cover what chocolate tempering is, why it matters, and how it works, before diving into the main methods and techniques.
In this guide to chocolate tempering, we’ll cover:
- The three main tempering methods: seeding, microwave tempering, and tabling
- Seeding and microwave tempering in detail, with step-by-step photo instructions
- The tools you need to get started
- Dark vs. milk vs. white chocolate and how they differ when tempering
- Couverture vs. compound chocolate and when to use each
- Troubleshooting: common tempering problems and how to fix them
We’ll focus mainly on two different tempering methods: seeding and microwave tempering. Seeding is a great beginner-friendly method, while microwave tempering is my personal favorite because it’s quick and efficient once you’re comfortable working with chocolate.
By the way, hi – I’m Louise! 👩🏼🍳Welcome to my little recipe universe. I have 180+ recipes, from individual pastry layers to complete entremet cakes, which you can browse by flavor, season, difficulty, and more. I also share guides and articles breaking down pastry science and techniques, along with troubleshooting guides to help you understand why things go wrong and how to fix them. I hope you’ll stick around and bake with me!
Chocolate Tempering: The Basics
So… what is chocolate tempering anyway?
Chocolate tempering is the process of heating and cooling chocolate to specific temperatures to guide the cocoa butter into a stable crystal structure. This is what gives tempered chocolate its glossy finish, crisp snap (one of my favorite sounds in the world!), clean release, and ability to hold its shape.
Chocolate is made primarily from cocoa butter and sugar, with cocoa solids and milk solids varying depending on the type of chocolate – dark, milk, or white. The cocoa butter is the key to tempering because it can form several different types of crystals, and the goal of tempering is to encourage the formation of the stable crystals that give chocolate its characteristic shine, snap, and clean finish.
Only one of these crystal structures gives chocolate the properties we’re looking for, so tempering is essentially about encouraging the right crystals to form and making sure they are evenly distributed.
This happens by carefully heating, cooling, and reheating the chocolate to specific temperatures, which melts the unstable crystals and encourages the stable ones to form.
Why does chocolate tempering matter?
Tempering is important when you’re working with chocolate for decorations, molds, bonbons, chocolate bars, or anything else that needs to be firm, glossy, and polished.
If you don’t temper your chocolate properly (or if you skip tempering entirely), then your chocolate can set with a dull finish, soft texture, or streaky appearance, and ultimately will not hold its shape well. A chocolate ribbon can crack when wrapped around a cake, or a delicate spiral can break when lifted from the acetate.
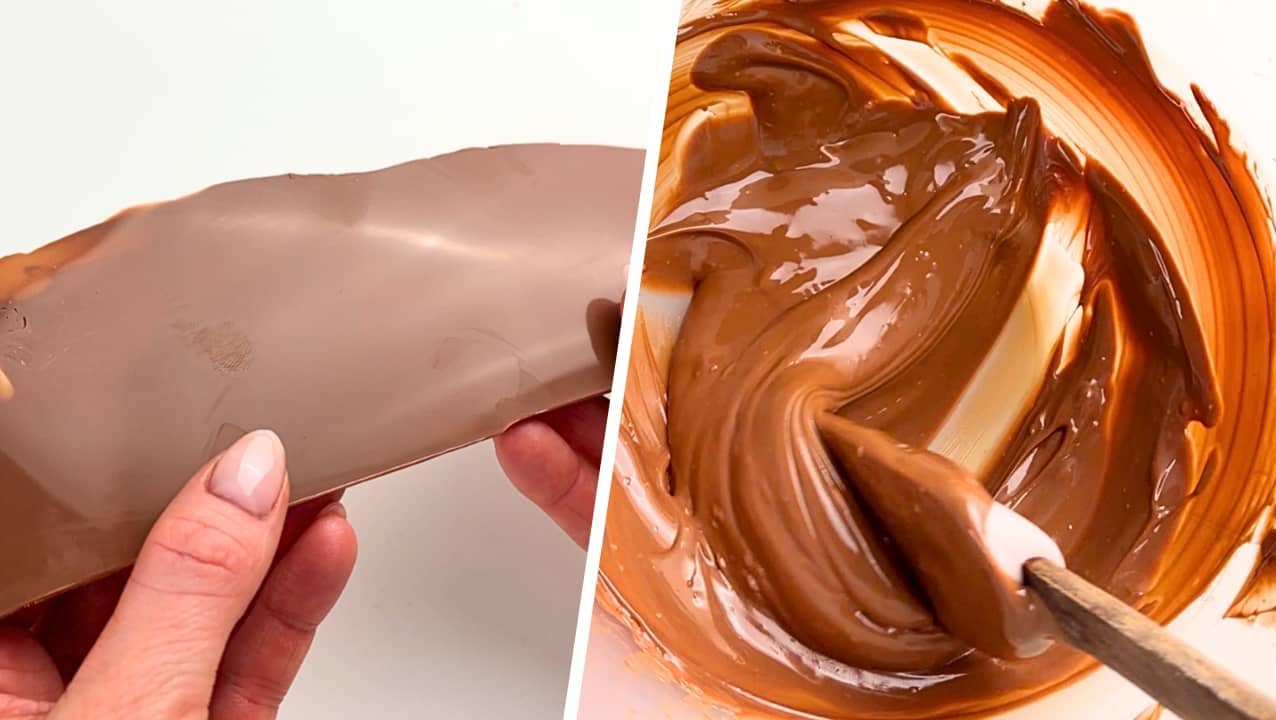
If your chocolate isn’t tempered properly, it can end up looking something like this:

And when your chocolate is properly tempered, you get that beautiful shiny finish – it should look something like this:
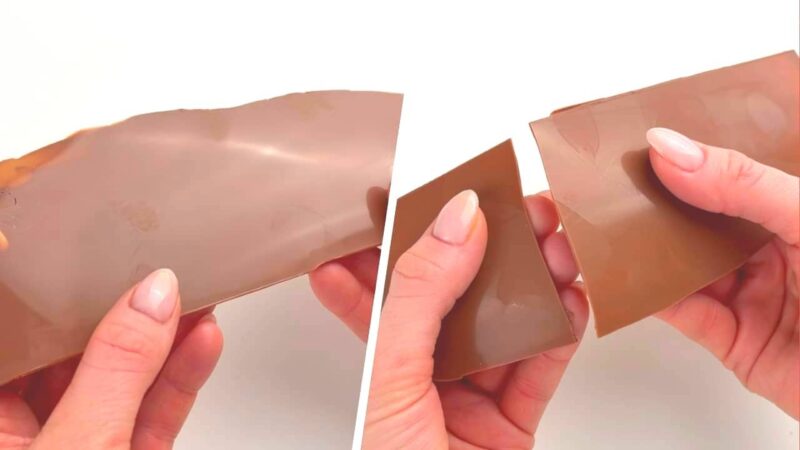
So while the glossy shine and satisfying snap are nice, tempering is really about making chocolate stable, strong, and predictable enough to work with.
We all know that tempering can be intimidating, especially if you’re not sure what to look for, but it’s really a must if you want to make chocolate decorations properly. I use tempered chocolate in all of my cakes with chocolate decor, so it’s definitely a technique worth getting comfortable with if you want to create clean, professional-looking designs.
What actually happens when you temper chocolate?
There are three things to keep in mind when tempering chocolate: temperature, time, and movement. No matter which method you use, all three play a role in helping the right cocoa butter crystals form and distribute evenly.
- Melting: Chocolate is heated enough to melt the existing cocoa butter crystals.
- Cooling: As the chocolate cools, new crystals begin to form.
- Movement: Stirring helps distribute the developing crystals throughout the chocolate and encourages a more even structure.
Visualize itYou can think of tempering as guiding the chocolate toward the crystal structure we want. The exact temperatures vary depending on whether you’re working with dark, milk, or white chocolate, but the basic principle remains the same: melt, cool, and work the chocolate in a controlled way.
What happens when tempering goes wrong?
When the cocoa butter doesn’t crystallize correctly, you’ll usually notice it in the finished chocolate. It may have a dull or streaky appearance, a soft or crumbly texture, or develop fat bloom (those white, chalky streaks you sometimes see on chocolate).
If you’ve ever had chocolate that looked perfect while working with it but turned dull or soft once it set, this is usually where things have gone wrong.
Common reasons tempering fails include:
- The chocolate is overheated: This can melt the stable crystals, meaning you need to start the tempering process again.
- The chocolate is not heated enough: Unstable crystals can form instead of the stable structure you want.
- Not enough movement: The chocolate hasn’t been stirred enough to evenly distribute the stable cocoa butter crystals throughout the mixture.
Take your chocolate skills beyond temperingand learn how to create beautiful chocolate decorations for your cakes. In my Chocolate Decoration Course, you’ll learn how to turn tempered chocolate into elegant, professional-looking decorations that will take your cakes to the next level. Learn more about the course
Chocolate Tempering Methods
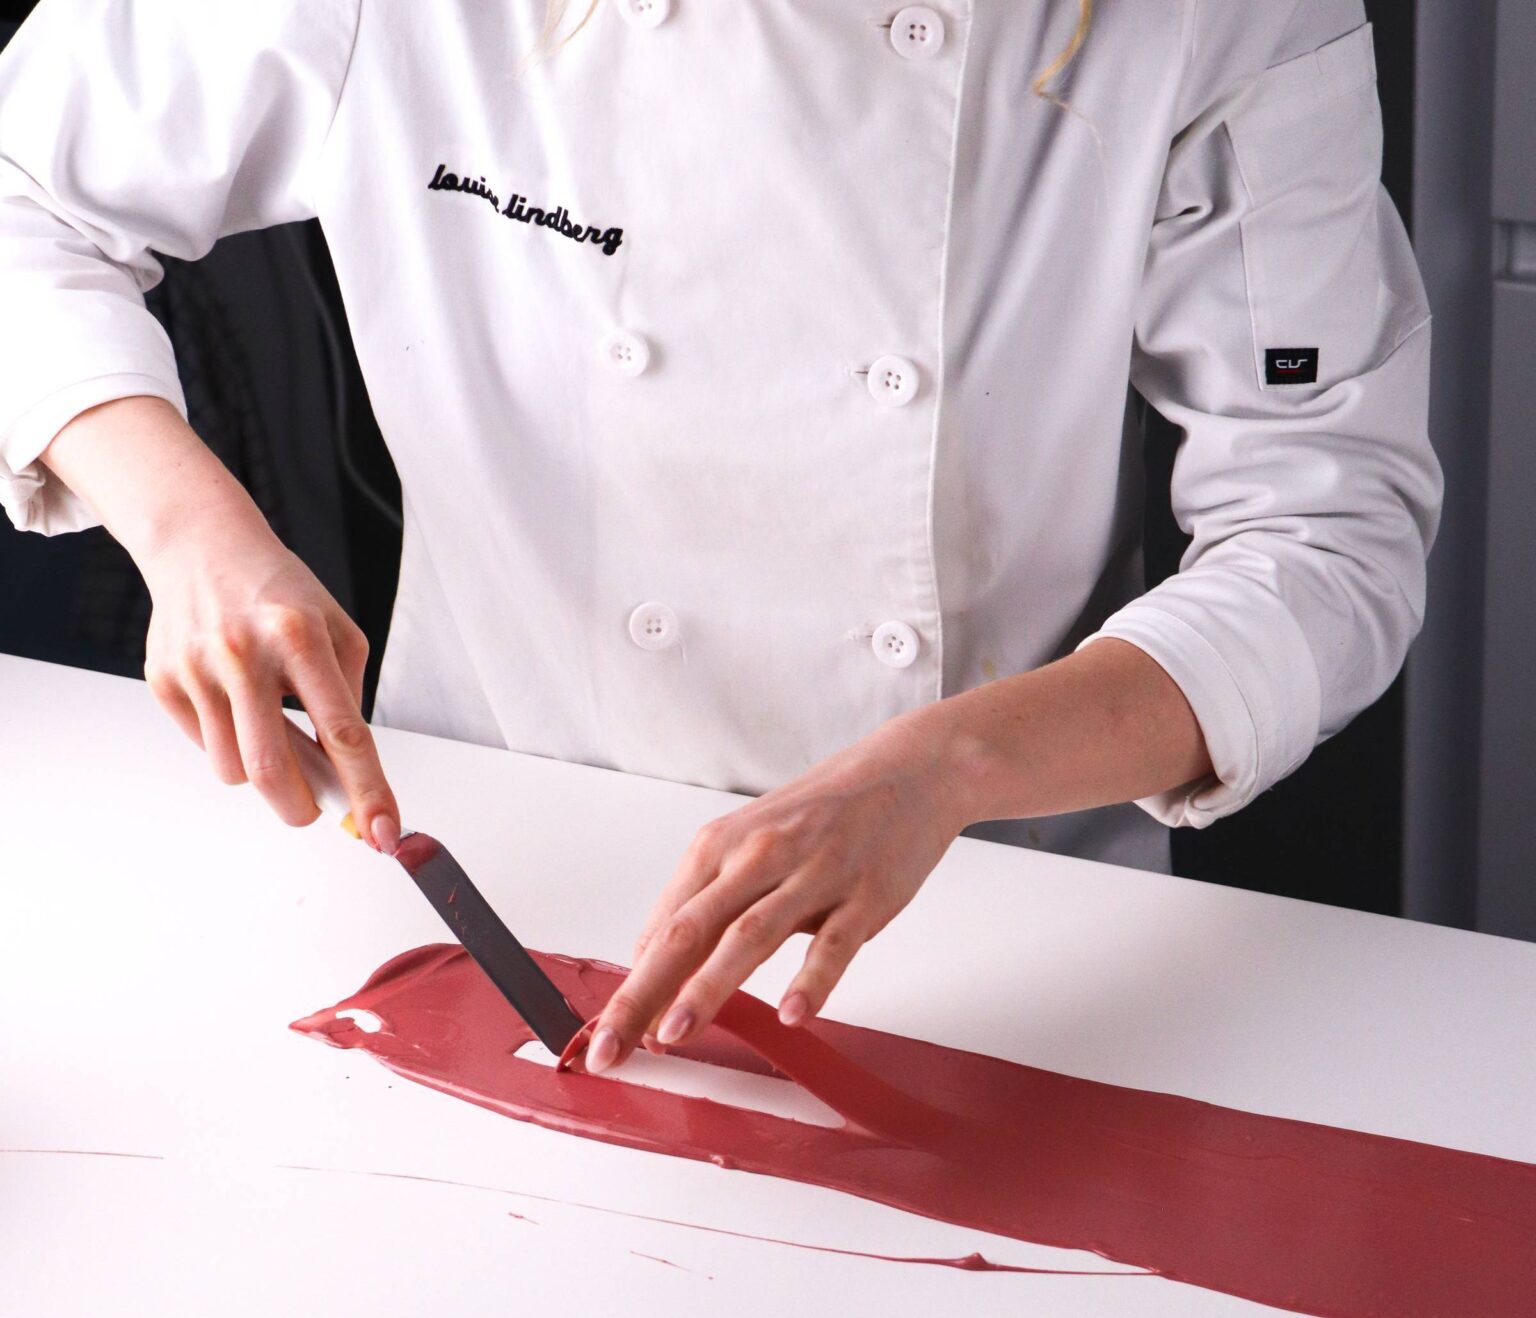
There are three main ways to temper chocolate, and each has its own advantages. In this guide, we’ll focus on the two methods I prefer and recommend most: seeding and microwave tempering.
- Seeding: A great method for beginners because it’s straightforward and very reliable. It involves gradually heating and cooling the chocolate and usually takes around 15 to 20 minutes.
- Microwave: My personal go-to method. It uses short bursts of controlled heating and can be done in as little as three minutes, making it a quick and efficient option.
- Tabling: This method involves spreading chocolate over a cool, flat surface (typically marble or steel) to encourage crystallization. I find it a little more complex and messier, and it requires a long, cold, smooth surface like marble or granite (which isn’t available in most home kitchens), so I won’t be covering it in detail in this article.
The Chocolate You Use Matters

Dark vs. Milk vs. White Chocolate
Before we get into the methods, there’s one more important takeaway: different types of chocolate have different tempering temperatures. This is because their composition affects how the cocoa butter crystals behave.
- Dark chocolate (54–70% Cocoa): With a higher percentage of cocoa solids and no milk, dark chocolate has a stronger crystal structure and can be worked at a higher temperature.
- Milk chocolate (32–38% Cocoa): The milk fat makes the cocoa butter crystals softer and less stable, so milk chocolate needs a lower working temperature.
- White chocolate (28–30% Cocoa): Since it contains cocoa butter, milk, and sugar but no cocoa solids, it has an even more delicate crystal structure and requires the lowest working temperature.
Did you know?The percentage on a chocolate bar refers to the total percentage of cocoa-derived ingredients, including both cocoa solids and cocoa butter.
I’ve included a handy temperature chart below so you can easily check the correct temperatures for each type of chocolate:

Couverture vs. Compound Chocolate
When baking, you’ll often come across two main categories of chocolate: couverture and compound chocolate.
Couverture chocolate uses cocoa butter as its fat, making it smoother and well suited to tempering. (e.g. high-quality chocolate brands like Valrhona & Callebaut)
Compound chocolate uses vegetable fats (e.g. palm oil) instead of cocoa butter and is usually very affordable, making it a convenient option for home baking. (e.g. supermarket baking chocolate)
But what about regular chocolate?Regular chocolate also uses cocoa butter, but is generally made for eating rather than professional chocolate work. You can still use it for chocolate decorations, but you should still temper it to achieve a good finish. (e.g. Milka, Lindt)
If you’re unsure, just check the ingredients:
- If chocolate is made using vegetable fats, it is compound chocolate.
- If it uses cocoa butter and no vegetable alternatives, it is either regular or couverture chocolate.
- Couverture has a higher percentage of cocoa butter – 32 to 39%.
Couverture is what I use today, as I prefer its quality, texture, and final taste. I find it gives chocolate decorations a smoother finish and a more refined flavor, which is why I most often work with Callebaut.
When I first started baking, I mostly used regular and compound chocolate, and they can absolutely work for many recipes. However, they can be thicker and less fluid when melted, which can make them a little trickier to work with when creating thin, delicate, or detailed chocolate decorations.
Psst…You may read that compound chocolate doesn’t need to be tempered. However, I recommend tempering it anyway when making chocolate decorations, as I find it gives me better results and a nicer finish. If you’re just getting started, use whatever chocolate you have access to and experiment to see what works best for you. Just make sure the chocolate’s percentage is roughly in line with what the recipe calls for.
And don’t worry about wasting chocolate – leftover chocolate can be melted and reused, even if it’s been overheated.
So if your chocolate doesn’t temper perfectly the first time, don’t panic! You can always let it set, melt it again, and start over – that’s the beauty of chocolate tempering
So, let’s get into the seeding method step by step.
The Seeding Method: The Best Beginner-Friendly Way to Temper Chocolate
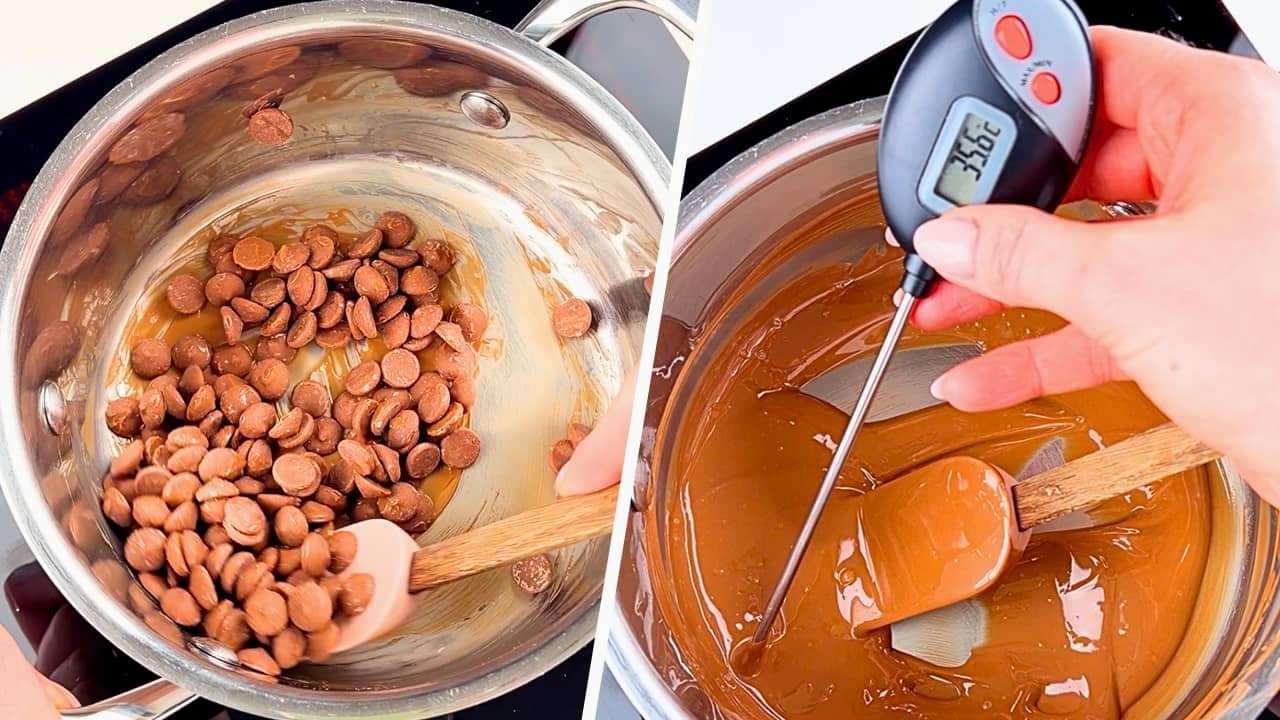
The seeding method is one of my favorite ways to teach chocolate tempering because it’s simple, controlled, and very reliable.
You’ll work the chocolate through three temperature stages – melt, seed, and reheat – using your thermometer to guide you through each one:

What You’ll Need
Before you begin, gather:
- Small stainless steel pot
- Water bath: I recommend using one if you’re new to tempering, although it isn’t essential and I personally don’t use one.
- Thermometer
- Stove/hob
You’ll also need your chocolate divided into two-thirds and one-third, with the final one-third finely chopped.
The three steps below follow the temperature stages shown in the image, so you can see how the chocolate should look and what temperature you’re aiming for at each stage.
1. Melt ⅔ of the Chocolate

First, we’re going to completely melt two-thirds of the chocolate and bring it to the first temperature, based on the type of chocolate you’re using. This resets the existing crystal structure so we can start the tempering process from scratch.
- Place ⅔ of the chocolate in a small stainless steel pot.
- Gently melt it over a water bath on the stove, stirring occasionally.
- Make sure no water or steam comes into contact with the chocolate, as this can cause it to seize.
- Use a thermometer to check the temperature and heat the chocolate to the melting temperature for your type of chocolate. Refer to the temperature table above (as the temperature will vary depending on the type of chocolate you use).
- Be careful not to overheat the chocolate. If you go significantly above the recommended temperature, you’ll need to start the process again.
2. Add the Remaining Chocolate

Now we’re going to cool the chocolate and introduce the stable crystals that will help create the structure we want. This is the seeding step.
- Remove the melted chocolate from the heat.
- Gradually add the remaining ⅓ of finely chopped chocolate, stirring continuously.
- Keep stirring as the warm chocolate melts the added chocolate and brings down the temperature.
- Continue until the chocolate reaches the second temperature indicated on the chart.
You may not need to use all of the chopped chocolate – stop adding chocolate once you reach the correct temperature. - A few tiny pieces of chocolate are okay, but ideally almost all of it should have melted. If you have lots of unmelted chocolate, it may not melt properly during the final step.
Top Tip: The finer you chop the chocolate, the more easily it will melt, so take a little extra time to chop it finely before you begin.
3. Reheat to the Working Temperature

The final step is to gently bring the chocolate back up to its working temperature. This melts away unstable crystals while keeping the stable ones we’ve developed during seeding.
- Place the chocolate back over the water bath.
- Gently reheat it while stirring.
- Use your thermometer to bring it to the final working temperature for your type of chocolate.
- Keep a close eye on the temperature, as chocolate heats up quickly at this stage.
- Do not overheat the chocolate, as this can undo the temper and mean you need to start again.
How do you know when your chocolate is properly tempered?
You’ll know your chocolate is ready when it reaches the final temperature.
With the seeding method, temperature is your most important guide, which is one reason I think it’s such a great method for beginners. If you follow the temperature guidelines and bring the chocolate to the correct working temperature, it’s quite difficult to go wrong.
Top Tip: Keep the temperature table close. I used to keep my temperature table right beside me while learning – it’s a nice reference to have nearby.
Properly tempered chocolate should be smooth, glossy, and fluid, with a slight resistance when stirred. When lifted with a spatula, it should flow smoothly in a ribbon.
It should look like this:

Time to test your tempering!Make chocolate decor from spires to bows to spirals with your new tempering skills! And learn even more about chocolate tempering and chocolate decorations for entremets in my Chocolate Course.
The Microwave Method: My Go-To Way to Temper Chocolate

Now for my personal favorite: microwave tempering. I love this method because it’s quick, simple, and much less messy than tabling, and there’s no need to add extra chocolate or move through separate heating and cooling stages like with the seeding method.
The main difference is that you’re not relying on temperature alone – you also need to pay close attention to how the chocolate looks and flows as you work. The chocolate continues melting from its residual heat between intervals, so you don’t always need to return it to the microwave just because there are still some solid pieces.
The more you knowThe key to this method is to heat the chocolate as little as possible and work in short intervals. Stir between each interval so the melted chocolate gradually melts the remaining chocolate, giving you better control and helping prevent overheating.
That’s why I usually recommend this method once you have a little tempering experience under your belt. It’s much easier to judge when the chocolate needs more heat when you already know what properly tempered chocolate should feel and look like – from how fluid it should be to when it’s becoming too thick or starting to set.
As with any tempering method, time, temperature, and movement all work together to help you achieve a well-tempered chocolate.
For the microwave method, heat the chocolate in three stages of decreasing intervals:
- 20–30 seconds
- 10–15 seconds
- 3–5 seconds
As you do this, watch the texture to guide you to the perfect working temperature. You can refer to the temperature table.
For even more accuracy, use a thermometer:
What You’ll Need
The microwave method requires only three tools!
- Tempering bowl: Use a plastic bowl that is heat-resistant – this is important! You don’t have to get too fancy though; mine is from IKEA.
- Digital Thermometer
- Microwave: I use a 1,000-watt microwave. Lower wattages are fine, but you may need slightly longer intervals, while higher wattages will require shorter intervals.
1. Heat for 20–30 Seconds

If you’re not using chocolate callets, start by roughly chopping your chocolate. Then we’ll begin with a longer microwave interval to get the melting process started.
- Place the chocolate in the microwave and heat for 30 seconds.
- At this stage, the chocolate should have started melting but still contain plenty of solid pieces.
- Stir thoroughly to distribute the heat and help the melted chocolate melt more of the remaining pieces.
- You want roughly 40% of the chocolate to be melted at this point. If it’s not there yet, give it a little longer and stir well to check how much has melted.
- Remember, the goal is to heat the chocolate gradually, not melt it completely in one go.
2. Heat in 10–15 Second Intervals
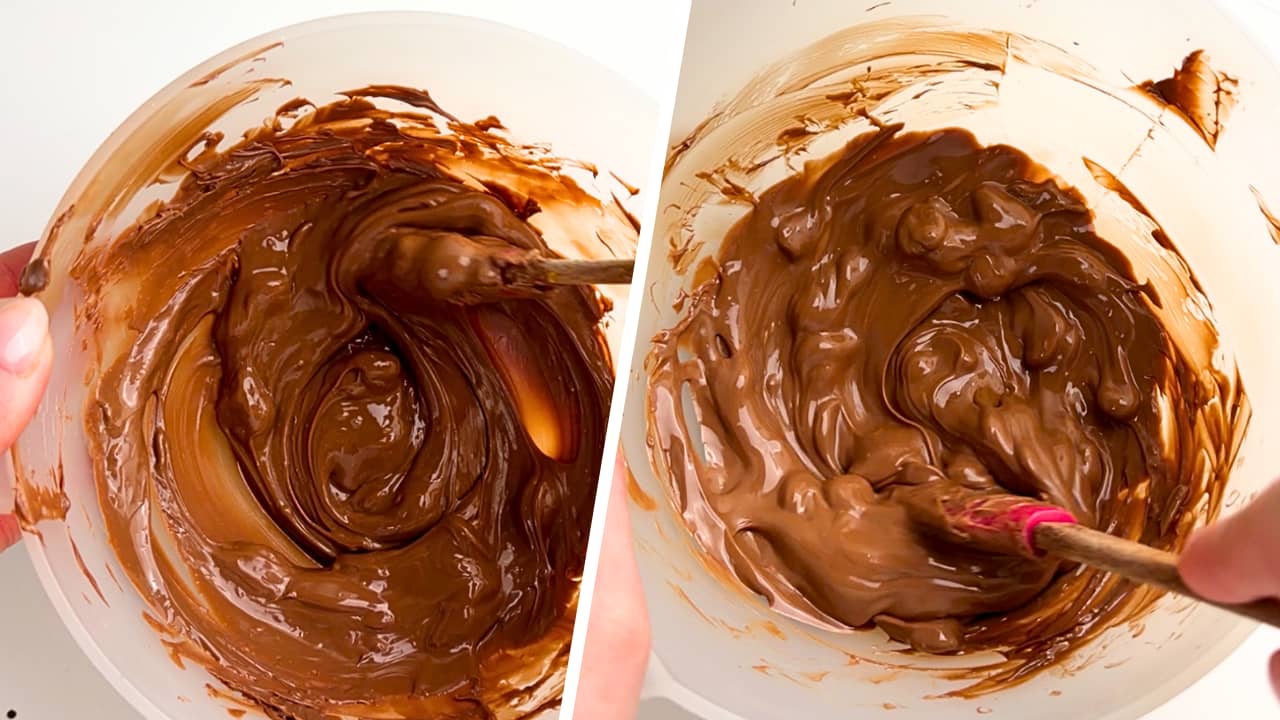
Now we start shortening the intervals. The chocolate is already warm, so we want to gently increase the temperature without overheating it.
- Heat the chocolate in 10–15 second intervals, stirring very well after each one.
- Each time you remove it from the microwave, stir thoroughly and check both the temperature and texture before deciding whether it needs more heat.
- If the chocolate is becoming more fluid and the remaining pieces are melting through stirring, give it another good stir before putting it back in the microwave.
- Keep an eye on both the temperature and texture, referring to the temperature chart above for your type of chocolate, if necessary.
- At this stage, around 80% of the chocolate should be melted.
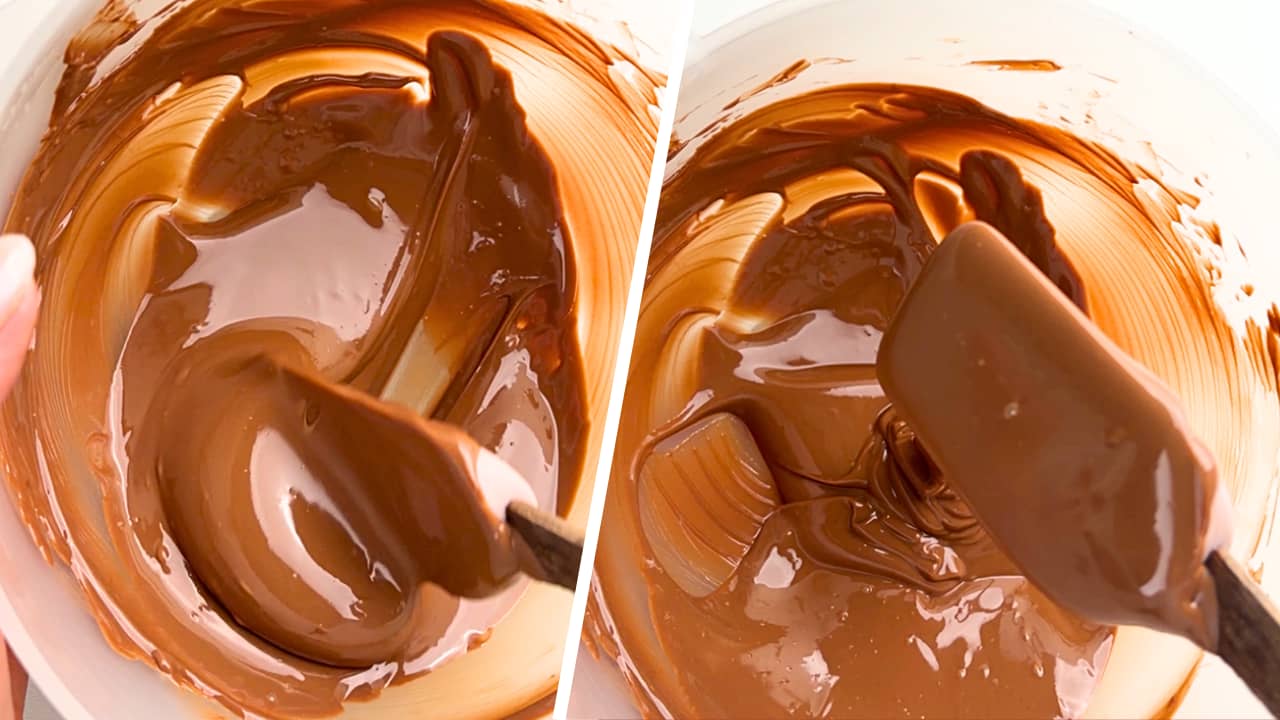
Top Tip: It’s always better to use shorter intervals than to overheat the chocolate. If the chocolate becomes very fluid and too hot, you’ll need to start the tempering process again.
3. Heat in 3 to 5-Second Intervals
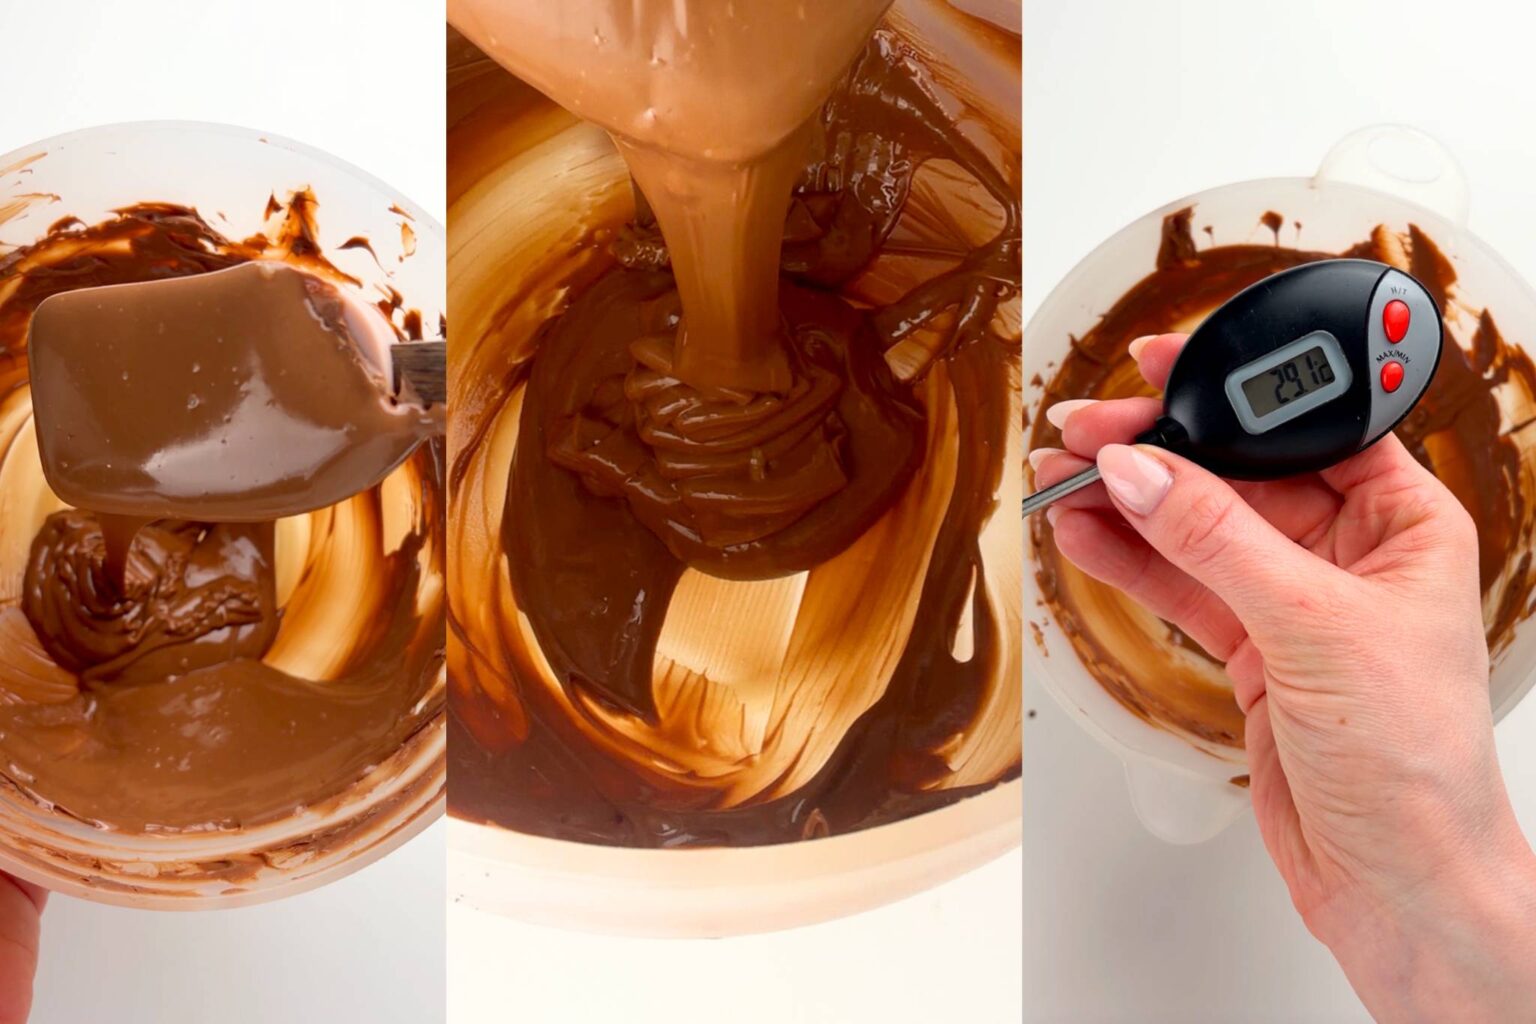
We’re almost there! Now we reduce the intervals even further so we can melt the final bits of chocolate and reach the final working temperature without overheating the chocolate.
- Heat for 3–5 seconds at a time, stirring thoroughly between each interval.
- As you stir, let the heat from the melted chocolate melt the remaining solid pieces before deciding whether another interval is necessary.
- Continue checking both the temperature and texture as you go – the chocolate should become increasingly smooth and fluid as the remaining pieces melt.
- Keep checking the temperature and texture as you go.
- Your chocolate is ready when it reaches the final working temperature for its type and has a slightly thicker, smooth consistency with a little resistance when stirring.
The microwave method can take as little as three minutes, and once you get used to the short intervals and learn to recognize the right texture, it becomes such a satisfying way to temper chocolate.
Ready to Temper?
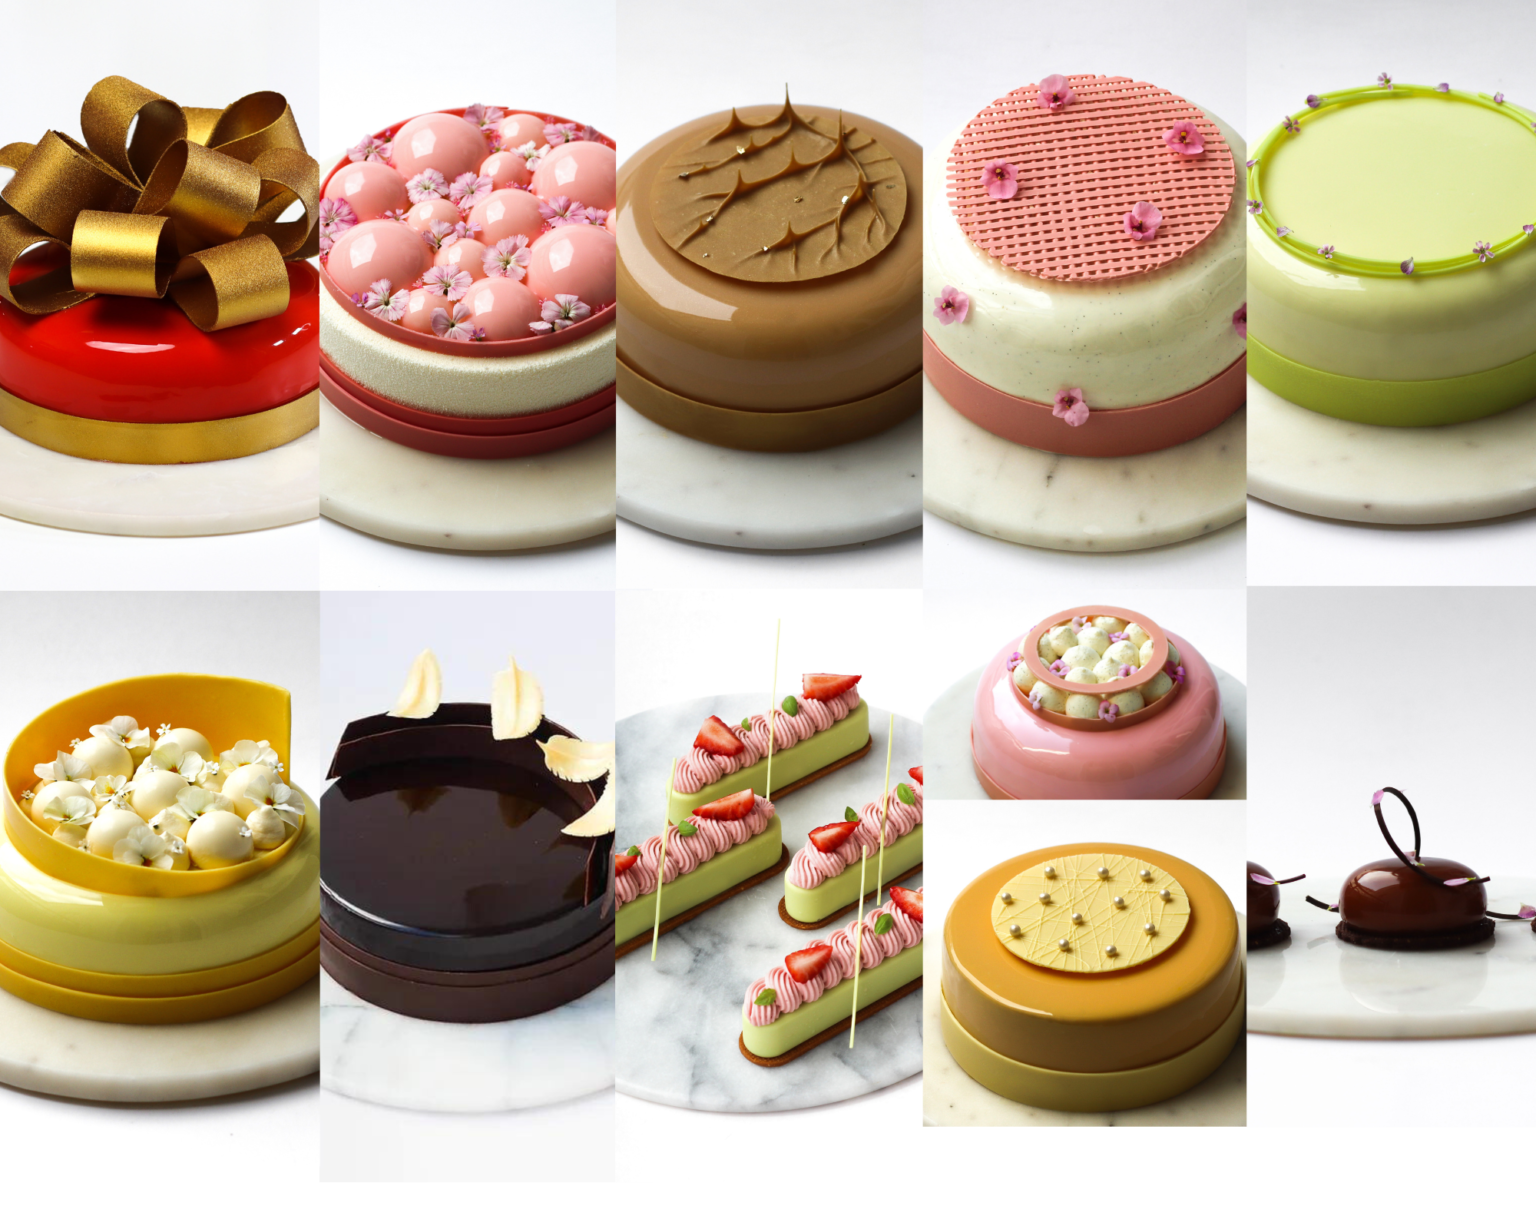
And there you have it! You’ve now learned two reliable ways to temper chocolate.
Tempering might feel a little intimidating at first, but once you understand the process and get a feel for the temperatures and textures, it becomes much easier.
And the best part? You can use those skills to create beautiful chocolate decorations for your cakes.
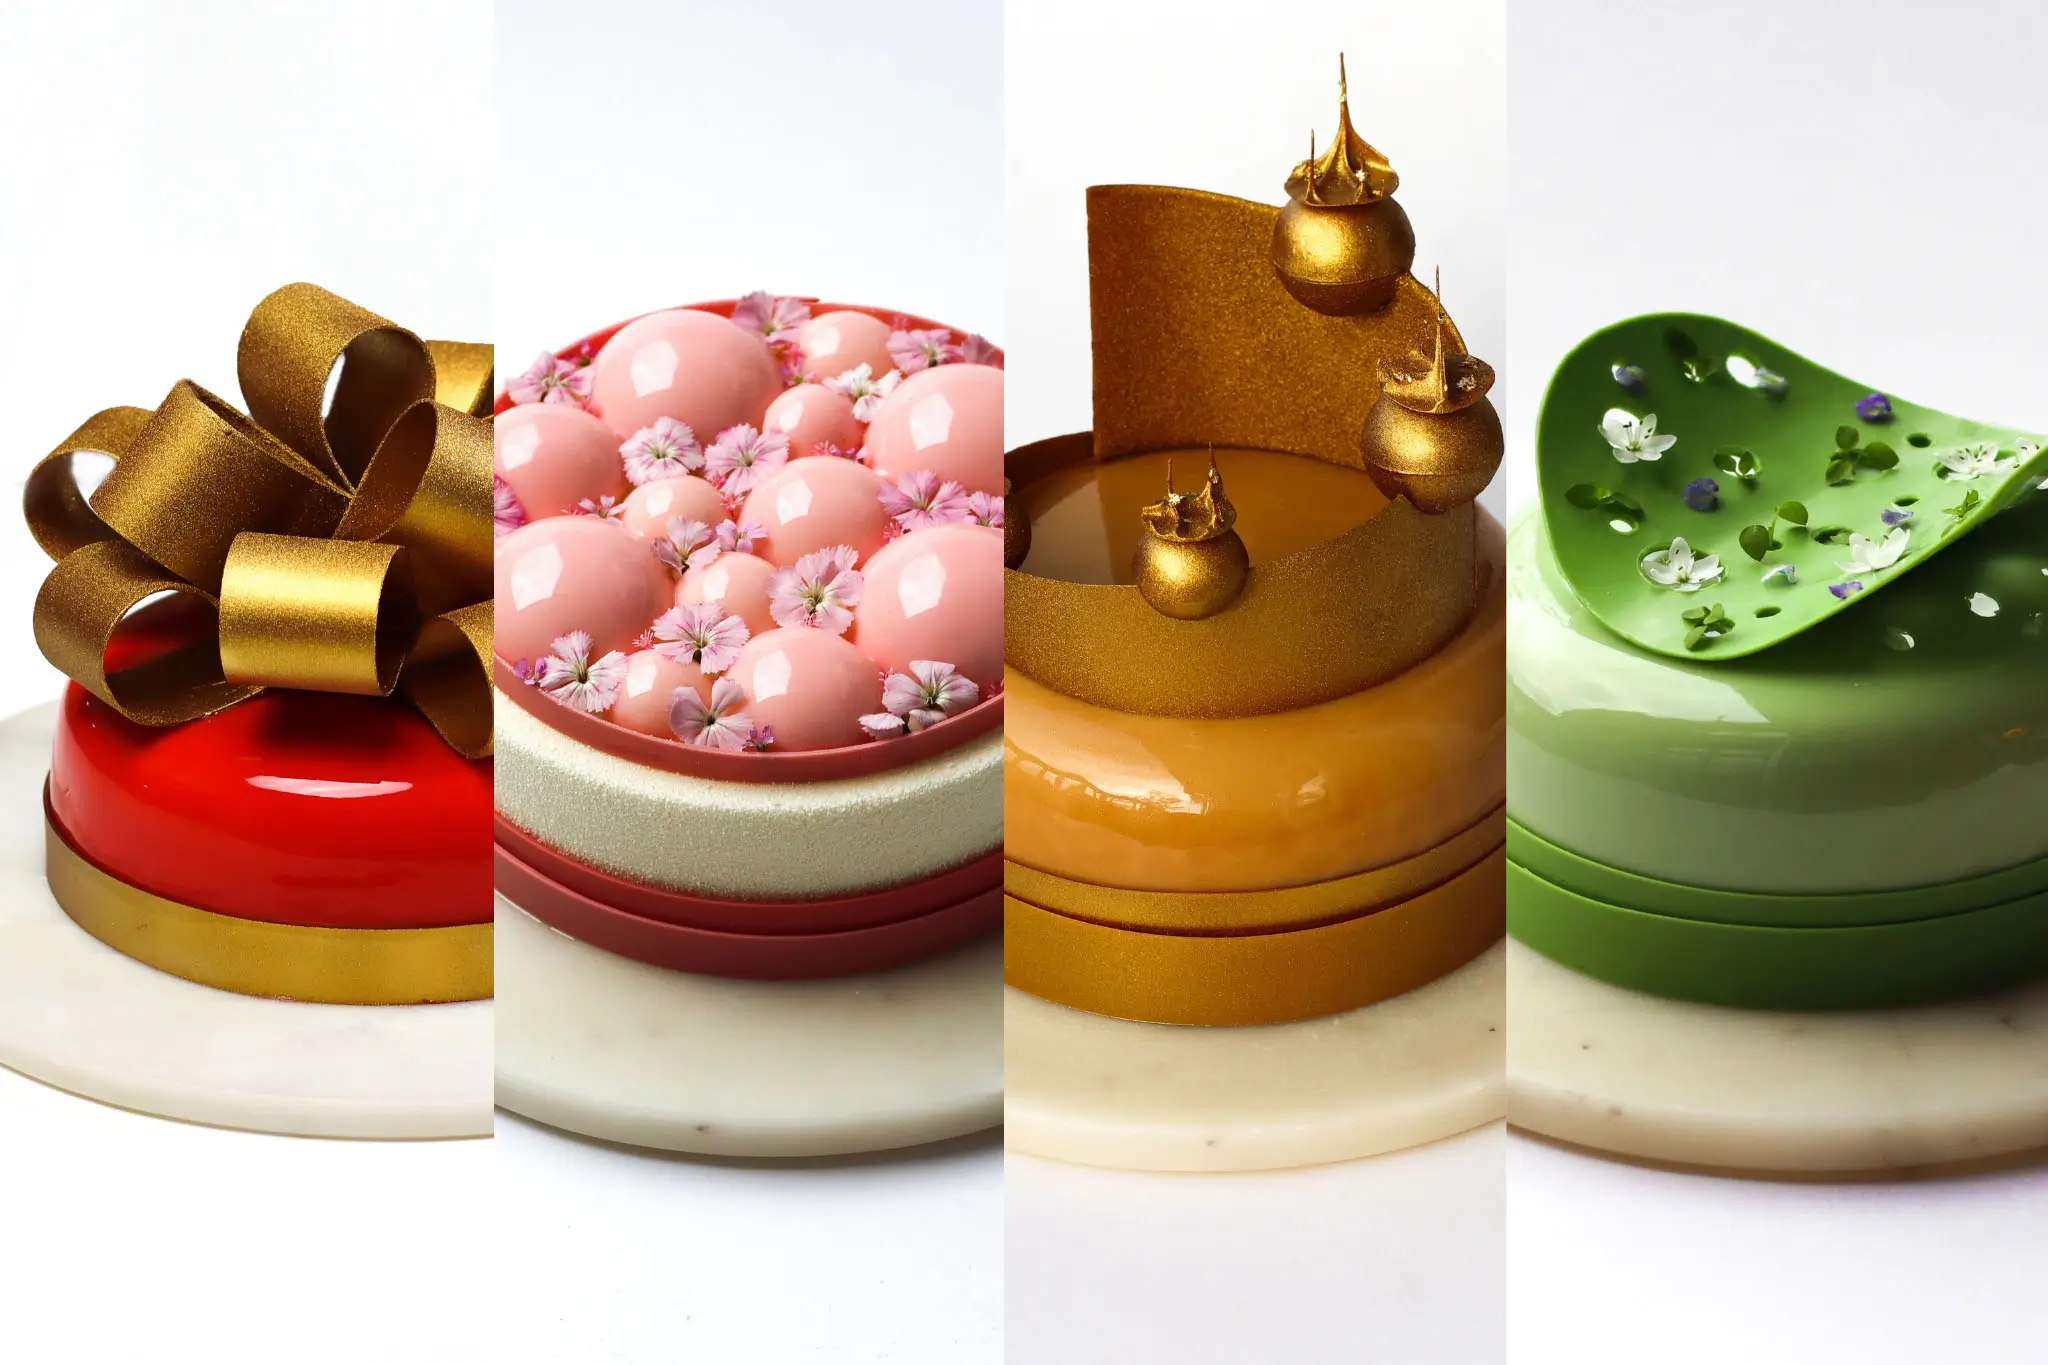
By the way, if you’d like to take your chocolate skills a step further, you’ll love my Chocolate Decorations Course! Inside, I’ll teach you how to create 10 stunning chocolate decorations, from my signature ribbons to extravagant spires and bows.
- 10 step-by-step chocolate decorations you can recreate at home
- An 85-minute Chocolate Tempering Video Course
- Step-by-step guidance for both microwave and seeding tempering methods
- Troubleshooting, detailed framework, and equipment lists to help you get consistent results
Master chocolate tempering, create beautiful decorations, and give your cakes that polished pastry-chef finish.
Discover 180+ recipes, from individual pastry layers to complete entremet cakes – all available to Recipe Members.
happy bakinglouise