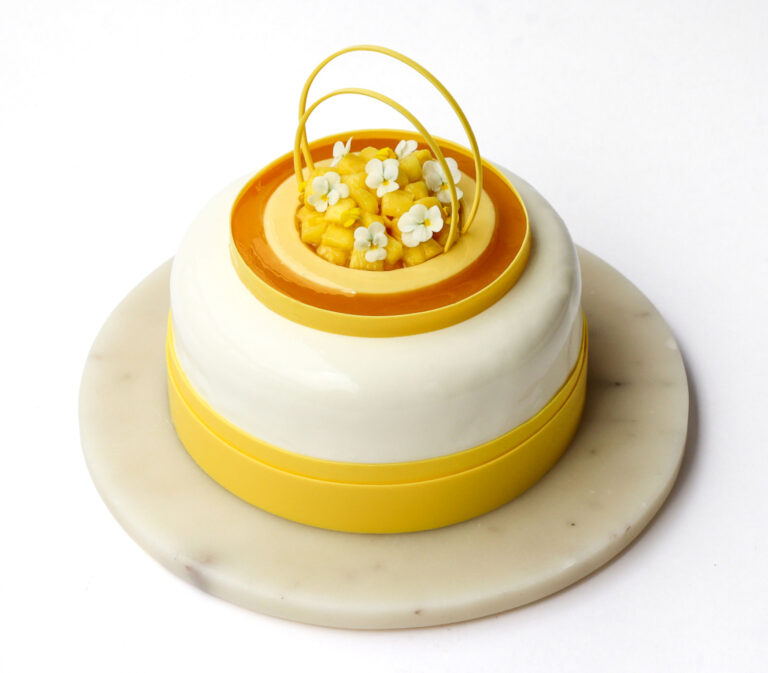
Rhubarb Cake with White Chocolate

This rhubarb cake is the perfect cake for getting started with French entremet/layer cakes with a cake base, mousse and ganache!

This cake is super fresh with the rhubarb, while perfectly balanced with the white chocolate. A fresh spring/summer cake for rhubarb lovers!

Happy baking <3

For extra guidance while baking, watch my step-by-step video tutorial, where I show you how to make the cake from start to finish:

youtube placeholder image

Day 1

Blondie with Rhubarb:

  • 60 g caster sugar
  • 65 g butter
  • 65 g white chocolate (28%)
  • 45 g all-purpose flour
  • 50 g eggs (approx. 1 medium egg)
  • 35 g white chocolate (28%) (roughly chopped)
  • 35 g almonds (roughly chopped)
  • 35 g fresh/frozen rhubarb
  • a pinch of salt
  1. Melt the butter and set it aside.
  2. Melt 65 g white chocolate and set it aside.
  3. Whisk the sugar, flour, egg and salt in a bowl until light and airy.
  4. Mix in the melted butter and melted chocolate.
  5. Stir in the 35 g chopped white chocolate and 35 g chopped almonds.
  6. Pour the batter into a 16 cm pastry ring / springform pan.
  7. Place the rhubarb in the batter.
  8. Bake the cake at 180°C / 356°F for approximately 16–20 minutes until set and golden.
  9. Place the cooled cake in a clean 16 cm pastry ring lined with an acetate sheet on the inside and parchment paper at the bottom.

Tips & Notes:

  • If baking with pastry rings, use two rings of different sizes and place a piece of baking paper in between to keep the batter contained.

Day 1

Rhubarb Ganache:

  • 170 g white chocolate (28%)
  • 150 g fresh rhubarb
  • 30 ml heavy cream (min. 35%)
  1. Melt the white chocolate and pour it into a bowl.
  2. Cook the rhubarb until tender and strain it to get 55 ml of rhubarb purée.
  3. Heat the rhubarb purée and heavy cream until almost boiling.
  4. Pour the mixture over the chocolate while stirring in the middle with a rubber spatula until the ganache becomes glossy.
  5. Pour the ganache into a plastic pitcher and blend with an immersion blender.
  6. Spread the ganache on top of the cake.
  7. Freeze the cake overnight.

Tips & Notes:

  • Only heat the cream until almost boiling, as cream that is too hot can cause the chocolate mixture to seize.
  • Stir the mixture with a spatula until glossy.

Day 2

Rhubarb Mousse:

  • 3 gelatin sheets (1 sheet = 1.75 g, bloom value 240)
  • 260 g rhubarb (fresh or frozen)
  • 120 g caster sugar
  • 1 tsp vanilla paste (1 vanilla bean)
  • 2 tbsp lemon juice
  • 300 ml heavy cream (min. 35%)
  1. Soak the gelatin in cold water for 5–10 minutes.
  2. Cook the rhubarb, sugar, vanilla and lemon juice in a pot until the rhubarb is completely tender.
  3. Take the pot off the heat and strain the mixture, extracting as much rhubarb purée as possible.
  4. Whisk the soaked gelatin into the purée.
  5. Let the purée cool to room temperature/lukewarm.
  6. Whip the heavy cream to soft peaks and fold it into the lukewarm purée (if it is too hot, the cream may separate).
  7. Pour the mousse into a silicone mold, 18 cm in diameter.
  8. Take the frozen cake out of the freezer and press it into the rhubarb mousse with the ganache facing downwards.
  9. Put the cake in the freezer overnight so it can set completely.
  10. The next day: Remove the cake from the mold and let it thaw in the fridge for 3–6 hours.

Tips & Notes:

  • Let the fruit syrup cool completely, as syrup that’s too hot will seize the whipped cream when added.
  • Whip the heavy cream to soft peaks, as overwhipped cream can result in a dense and grainy mousse.

Day 3

Decoration:

  • 160 g white chocolate (28%)
  • pink and peach food coloring powder
  • flowers (edible or secured with safety seal / edible wax)
  • glucose syrup

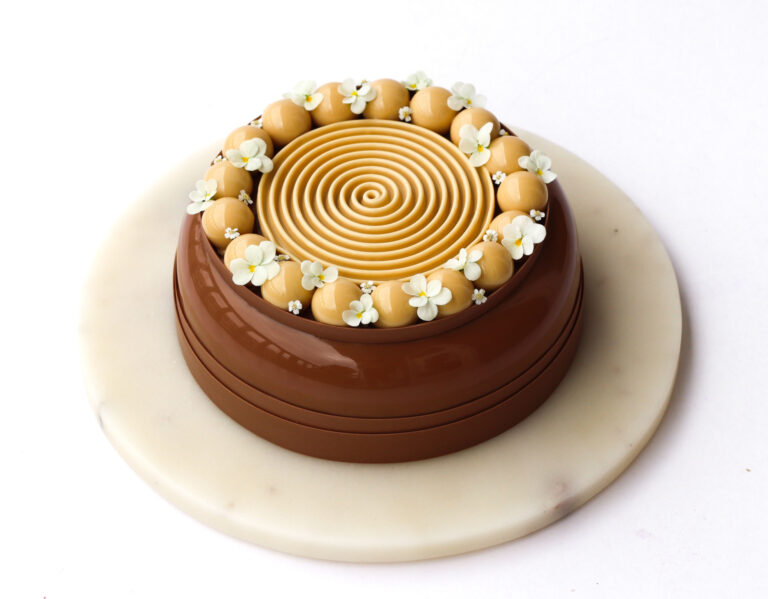
Temper and color the chocolate, then pour it onto acetate sheets and spread it evenly. Let it set slightly until firm but still flexible, shape it into the ribbon and rings, then peel off the acetate once fully set. For more guidance, you can see here how to make a chocolate ribbon and chocolate rings.

  1. Place the chocolate ribbon around the cake.
  2. Place 3 chocolate rings on top of the cake.
  3. Decorate with different flowers, attaching them with a little glucose syrup.

Cake Layer Overview:

Cake Base:
Blondie with Rhubarb 15 minutes

Creamy Elements:
Rhubarb Ganache 15 minutes

Mousse:
Rhubarb Mousse 25 minutes

Recipe Details:

Skill Level: Beginner

Yield & Time:

Servings / Yield: 8-10 servings

Total Active Working Time: 55 minutes
Approximate hands-on time only. Excludes weighing ingredients, baking, cooling, freezing, resting and assembly time, as well as the time required to prepare chocolate decorations.

This recipe may include affiliate links.

Essential Equipment:

  • Immersion hand blender (I recommend Bamix)
  • Digital thermometer
  • Hand mixer
  • Pastry rings: 1 x 18 cm diameter, 2 x 16 cm diameter
  • Silicone mold 18 cm diameter – Silikomart Torta Flex or similar

troubleshooting guide

Cake Base

Issue Cause Fix
  • Blondie is too dry or crumbly
  • Overbaking or oven temperature too high
  • Bake for a slightly shorter time
  • The center should feel just set and slightly soft
  • Remove from the oven before fully firm
  • Blondie is raw in the middle
  • Underbaking
  • Extend baking time slightly
  • Test with a small fork or cake tester - it should come out with moist crumbs, not liquid batter
  • Blondie sets on the edges but remains very soft in the center
  • Cake removed too early or uneven oven heat
  • Bake until the center no longer jiggles when gently shaken
  • Allow the blondie to cool completely in the pan to finish setting
  • Chocolate seized
  • Butter or chocolate overheated
  • Melt gently over low heat; avoid direct high heat
  • Use a waterbath
  • Blondie too liquid / doesn’t set
  • Underbaking
  • Extend baking time slightly
  • Test with a small fork or cake tester - it should come out with moist crumbs, not liquid batter
  • Blondie texture is dense and heavy
  • Insufficient incorporation of air into the eggs and sugar
  • Whisk eggs and sugar until the mixture looks lighter and slightly fluffy before adding chocolate and butter

Creamy Element

Issue Cause Fix
  • Ganache is grainy
  • Chocolate was overheated or cream was too hot
  • Heat cream only to approx. 80-85°C
  • Before pouring the hot cream over the chocolate, it should cool to approximately 50–55°C
  • Pour gradually over finely melted chocolate and stir
  • Ganache separates
  • Emulsion (mixing heavy cream and chocolate) not formed due to temperature difference
  • Stir in the middle of the bowl using a spatula
  • Use an immersion blender if needed to restore texture
  • Ganache is thick
  • Ganache wasn’t hand blended
  • Use an immersion blender to fully emulsify the ganache and achieve a smooth, fluid texture
  • Ganache is too thin
  • Too much cream, or ganache still warm
  • Allow the ganache to cool in the fridge or freezer to thicken naturally.

Mousse & Cream

Issue Cause Fix
  • Mousse is runny
  • Gelatine not activated, not enough chilling time, too weak gelatin
  • Ensure gelatine is fully soaked and dissolved; chill mousse thoroughly before unmolding, ensure bloom value matches recipe
  • Whipped cream too soft
  • Whip cream to soft peaks, but not too loose
  • Mousse is grainy or seized
  • Cream added too quickly or too cold
  • Whipped cream overwhipped
  • Overmixing after folding
  • Temper mixture gently, fold in cream in 2–3 batches
  • Only whip to soft
  • peaks
  • Fold just until incorporated, do not stir aggressively
  • Mousse collapsed after assembly
  • Mousse not set before layering
  • Allow mousse to partially set in mold before adding cake or inserts
  • Insert (e.g., cake layer) pushed down too hard
  • Gently place insert, don't press down
  • Mousse is too firm / rubbery
  • Too much gelatine
  • Reduce gelatine or use a more precise scale
  • Gelatine not evenly dispersed
  • Fully melt and strain gelatine mixture before adding to ganache
  • Mousse has air bubbles / holes
  • Folding too aggressively or too fast
  • Fold gently and slowly to preserve even texture
  • Not tapping the mold after filling
  • Lightly tap the mold on the counter to remove air pockets
  • Mousse stuck to mold or cracked when unmolding
  • Unmolded too early or mold not properly prepared
  • Freeze until completely set

shopping list

Dairy & Eggs

Chocolate & Confectionery

Fruit & Fresh

Baking & Dry Ingredients

Other

Scroll to Top