
Advertisement for Driscoll’s berries.
Raspberries have always been my favorite berry, so I’m especially happy about my collaboration with Driscoll’s, whose berries are always fresh, flavorful, and delicious.
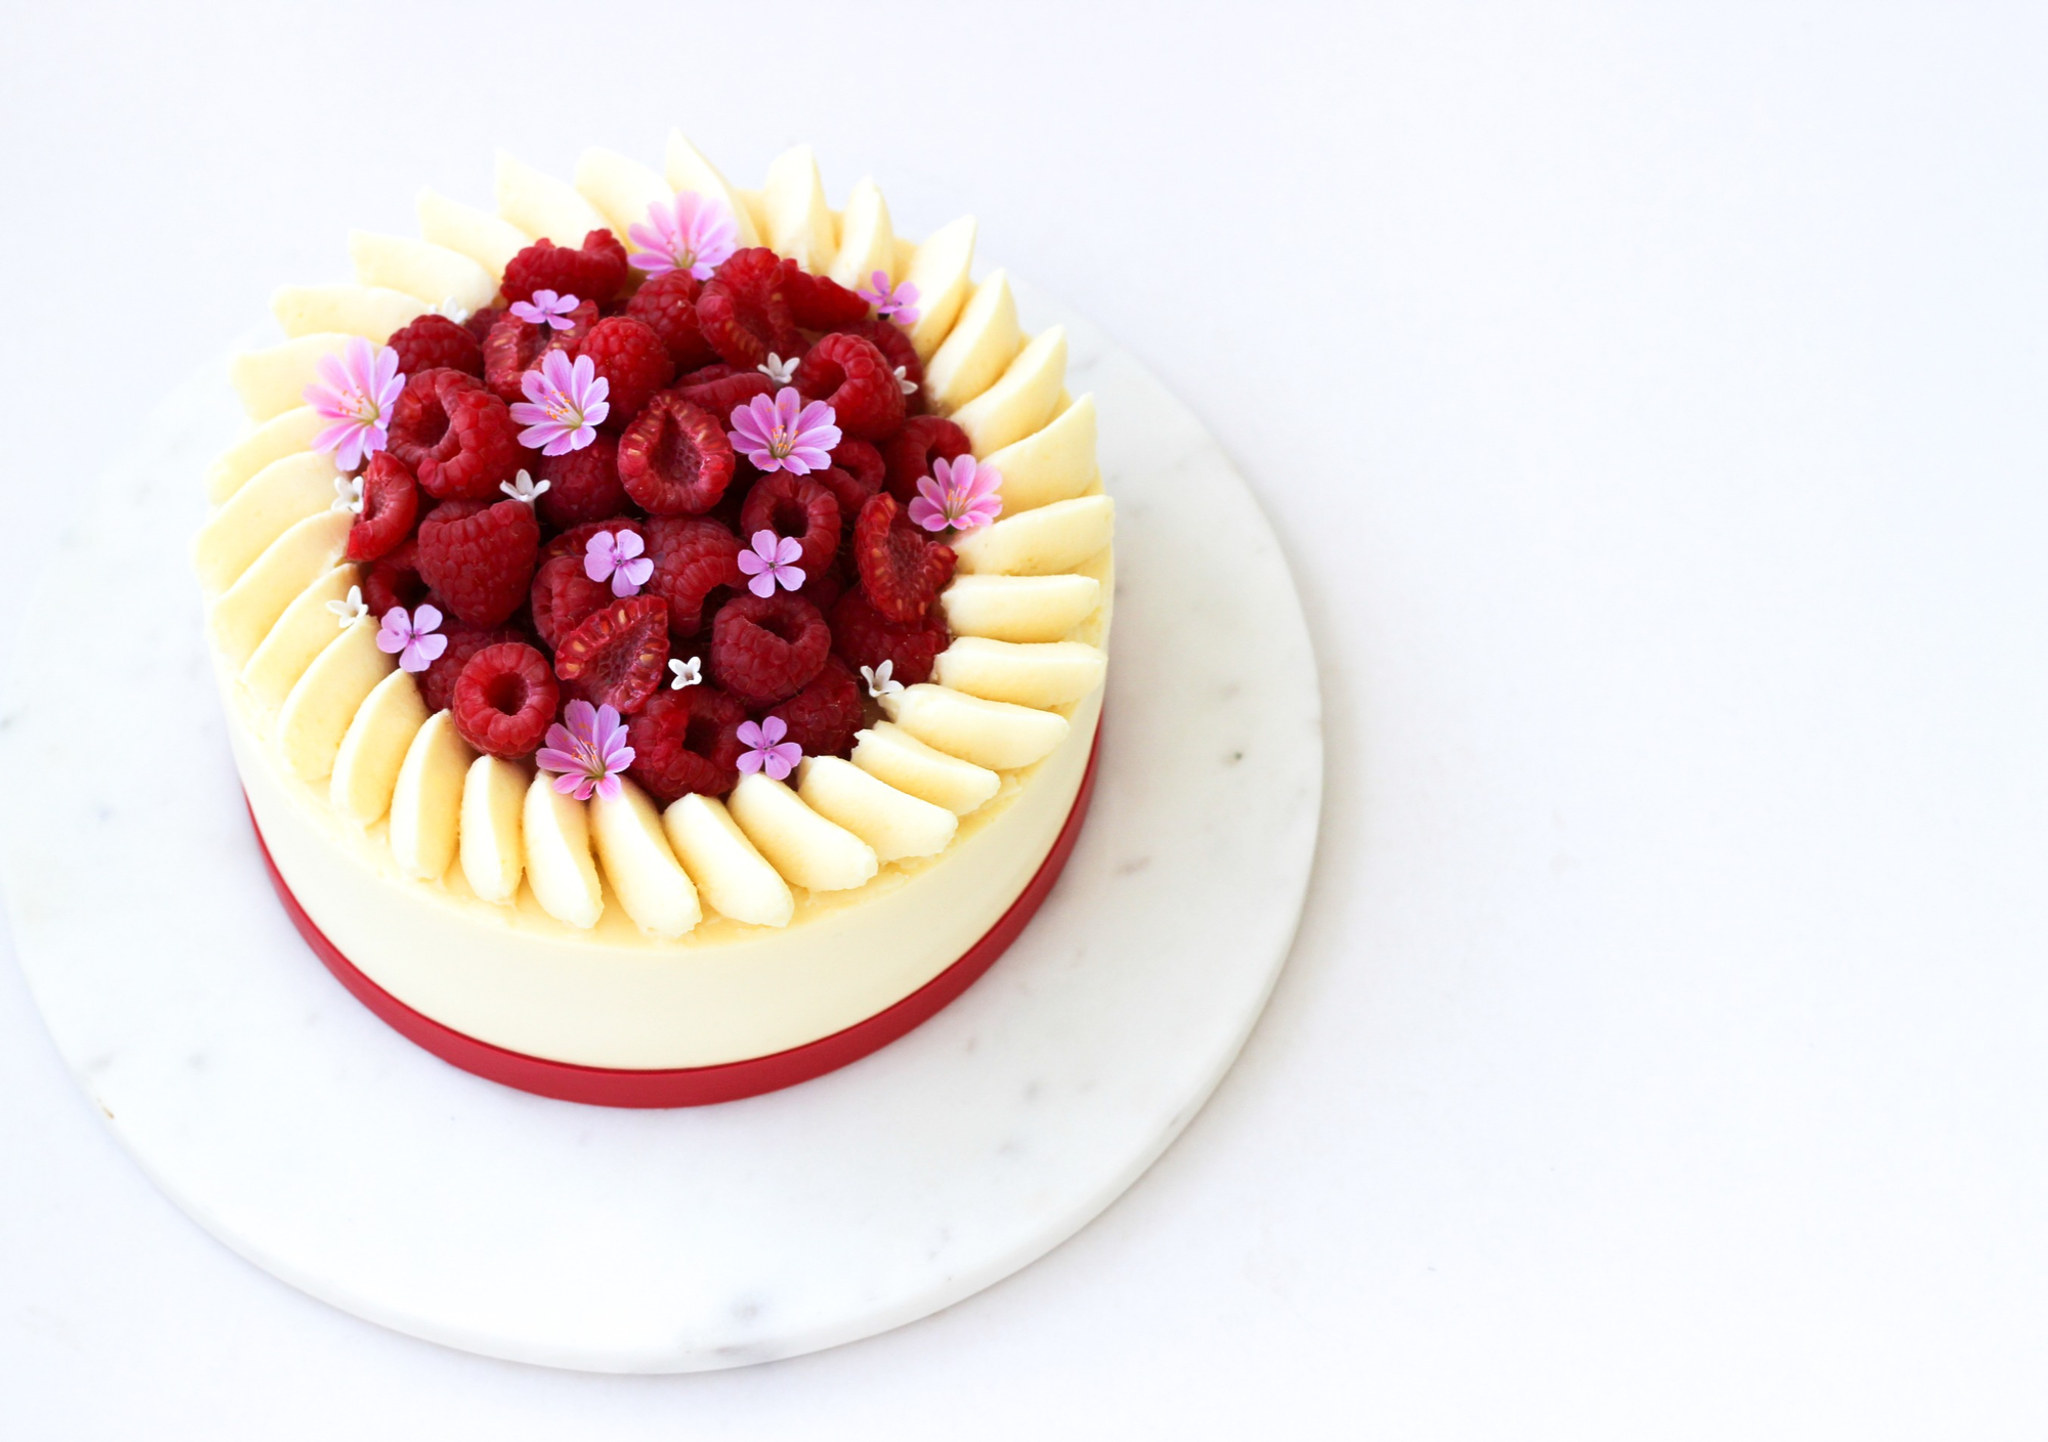
I’ve created a summery raspberry cake that is a true celebration of my favorite berry. A juicy marzapin base, crunchy almond croquette, chewy ganache, and velvety mousse come together beautifully with plenty of fresh, tart raspberries. Simply delicious!
I always reach for Driscoll’s berries when I’m baking because I know I can count on their freshness and quality. The berries are also organic, and their packaging is recyclable and contains 94% less plastic compared to their previous packaging. Using good-quality and more sustainable ingredients is important to me in the kitchen, which makes Driscoll’s berries a great choice for my many baking projects.
The spraying technique on top takes a little practice, but if you try it a few times before adding the cream, you’ll soon be able to create a beautiful, even pattern.
Happy baking <


Day 1
Almond Marzipan Base with Fresh Raspberries:
- 75 g marzipan
- 75 g butter (softened)
- 70 g caster sugar
- 50 g almond flour
- 75 g eggs (approx. 1.5 medium eggs)
- a pinch of salt
- 60 g fresh Driscoll’s raspberries
- Beat softened butter, sugar, salt, and marzipan until light and fluffy. Beat in the egg, then gently fold in the almond flour.
- Pour the batter into a lined 16-cm cake ring or springform pan.
- Press the fresh Driscoll’s raspberries into the batter and bake the base at 180°C / 356°F for about 20–25 minutes until it is a deep golden brown.
- Let the base cool completely. Place it in a clean cake ring (16 cm diameter) lined with an acetate sheet on the inside and parchment paper on the bottom.
Day 1
Almond Crunch with Ruby Chocolate, Raspberries, & Caramel:
- 80 g almonds
- 110 g caster sugar
- 70 g ruby chocolate (32.8%)
- 2 tbsp dulce de leche (alternatively, make your own by boiling condensed milk with sea salt)
- 2 tsp raspberry powder
- Blanch the almonds and roast them for 5–7 minutes at 175°C / 347°F. Let them cool.
- Gently melt the sugar in a saucepan until it turns golden and caramelized. Stir in the roasted almonds, then pour the mixture onto a sheet of parchment paper. Let cool completely.
- Place one-third of the caramelized almonds in a powerful mini food processor and blend into a coarse almond paste. Finely chop the remaining almonds.
- Gently melt the ruby chocolate, preferably in a double boiler, and set aside.
- Stir the almond paste and chopped caramelized almonds into the melted chocolate. Add the Dulce de Leche and raspberry powder, and mix until evenly combined.
- Spread the almond crunch evenly over the cake base. Place in the freezer while you prepare the chocolate ganache.
Tips & Notes:
- Don’t chop the nuts too finely, as this will reduce the crunch effect.
- Level the surface with a glass or a spoon.
Day 1
Milk Chocolate Ganache:
- 130 g milk chocolate (33%)
- 70 ml heavy cream (min. 35%)
- Gently melt the chocolate (if necessary, over a double boiler) and set it aside in a bowl
- Heat the heavy cream to a boil and pour it over the milk chocolate.
- Stir from the center of the mixture with a spatula until the ganache becomes glossy.
- Pour the ganache over the marzipan base and return the cake to the freezer. The ganache needs to set slightly before the next layer can be added.
Tips & Notes:
- Only heat the cream almost to a boil, as a too hot cream will seize the chocolate mixture.
- Stir the mixture with a spatula until glossy.
Day 1
Raspberry Mousse:
- 2 gelatin sheets (1 sheet = 1.75 g, bloom value 240)
- 130 g Driscoll’s raspberries
- 60 g caster sugar
- 0.5 tsp vanilla paste
- 1 tbsp lemon juice
- 130 ml heavy cream (min. 35%)
- 65 g Greek yogurt
- Soak the gelatin in cold water for 5–10 minutes.
- Bring Driscoll’s raspberries, sugar, vanilla paste, and lemon juice to a boil in a small saucepan until the berries are tender. Remove the saucepan from the heat, strain the mixture, and whisk in the gelatin.
- Let the mixture cool until lukewarm.
- Whip the heavy cream until lightly whipped, then fold in the yogurt. Next, fold the heavy cream-yogurt mixture into the raspberry syrup, which has cooled to lukewarm (if it’s too hot, it may cause the heavy cream to separate).
- Pour the raspberry mousse over the ganache. Place the cake in the freezer overnight so it can set completely.
Tips & Notes:
- Let the fruit syrup cool completely, as syrup that’s too hot will seize the whipped cream when added.
- Whip the heavy cream to soft peaks, as overwhipped cream can result in a dense and grainy mousse.
Day 2
White Chocolate Mousse:
- 1.75 gelatin sheets (1 sheet = 1.75 g, bloom value 240)
- 135 g white chocolate (28%)
- 300 ml heavy cream (min. 35%)
- Soak the gelatin in cold water for 5–10 minutes.
- Gently melt the white chocolate (if necessary, over a double boiler) and set the chocolate aside in a bowl.
- Heat 120 ml of heavy cream to a boil. Remove the saucepan from the heat and whisk in the gelatin.
- Pour the hot heavy cream over the chocolate while stirring in the center with a spatula until it comes together. Let the mixture cool to lukewarm.
- Whip the remaining heavy cream (180 ml) to soft peaks and fold it into the mixture, which has cooled to lukewarm (if it’s too warm, the heavy cream may separate).
- Pour the mousse into an 18 cm silicone mold lined with an acetate sheet, extending above the mold because the finished cake will be taller than the mold.
- Refrigerate the mousse until slightly thickened and able to support the frozen cake insert. It is ready when a spoon leaves a soft peak in the mousse.
- Remove the frozen cake from the freezer and place it into the white chocolate mousse with the raspberry mousse side facing down.
- Place the cake in the freezer overnight so it can set completely.
Tips & Notes:
- Only heat the cream almost to a boil before pouring it over the chocolate to avoid seizing the chocolate.
- Whip the heavy cream to soft peaks, as overwhipped cream can result in a dense and grainy mousse.
Day 2
White Chocolate Cream:
- 4 gelatin sheets (1 sheet = 1.75 g, bloom value 240)
- 165 g white chocolate (28%)
- 400 ml heavy cream (min. 35%)
- Soak the gelatin sheets in cold water for 5–10 minutes.
- Gently melt the white chocolate (if necessary, over a double boiler) and set the chocolate aside in a bowl.
- Heat the heavy cream to a boil. Remove the saucepan from the heat and whisk in the gelatin
- Pour the hot heavy cream over the chocolate while stirring in the center with a spatula until it comes together.
- Cover the cream with plastic wrap (all the way down so condensation doesn’t form) and refrigerate overnight. It’s important to let it chill all night; otherwise, it may separate when whipped.
- When you’re ready to decorate the cake, whip the cream until thick and transfer it to a piping bag fitted with a St. Honoré 25 tip.
- Practice your piping technique on a cutting board before you start piping onto the cake.
- Mark a small circle on top of the cake with a cookie cutter (12 cm in diameter) so you have a starting point to work from, ensuring that the piped leaves are all the same length.
- Pipe the cream onto the top of the cake in a consistent pattern, with the leaves close together and not extending beyond the edge of the cake.
Day 3
Decoration:
- 250–300 g Driscoll’s fresh raspberries (for garnish)
- 100 g white chocolate (28%)
- red powdered food coloring
- flowers (edible or secured with safety seal / edible wax)
- Cut a strip of acetate sheet measuring 1.5 cm x 58 cm. Set it aside on the kitchen counter.
- Place a cake ring (18 cm in diameter) in the refrigerator.
- Temper the chocolate and add a bit of red powdered food coloring (add a little at a time, as you can always add more, if desired).
- Pour the chocolate onto the acetate sheet, smooth the surface with a small palette knife, lift the acetate sheet off the counter, and run your fingers along the edge of the acetate sheet to remove any excess chocolate. Let the chocolate set a little.
- Once the chocolate has almost set, wrap the chocolate acetate sheet around the cold cake ring with the chocolate facing inward, and return it to the refrigerator. If the chocolate is too runny or hasn’t set, you won’t be able to remove it from the cake ring. So it’s important that the chocolate has almost set before you wrap the ribbon around the cake ring.
- Remove the acetate sheet once the chocolate has set.
- Carefully wrap the ribbon around the cake.
- Garnish with fresh Driscoll’s raspberries and edible flowers.