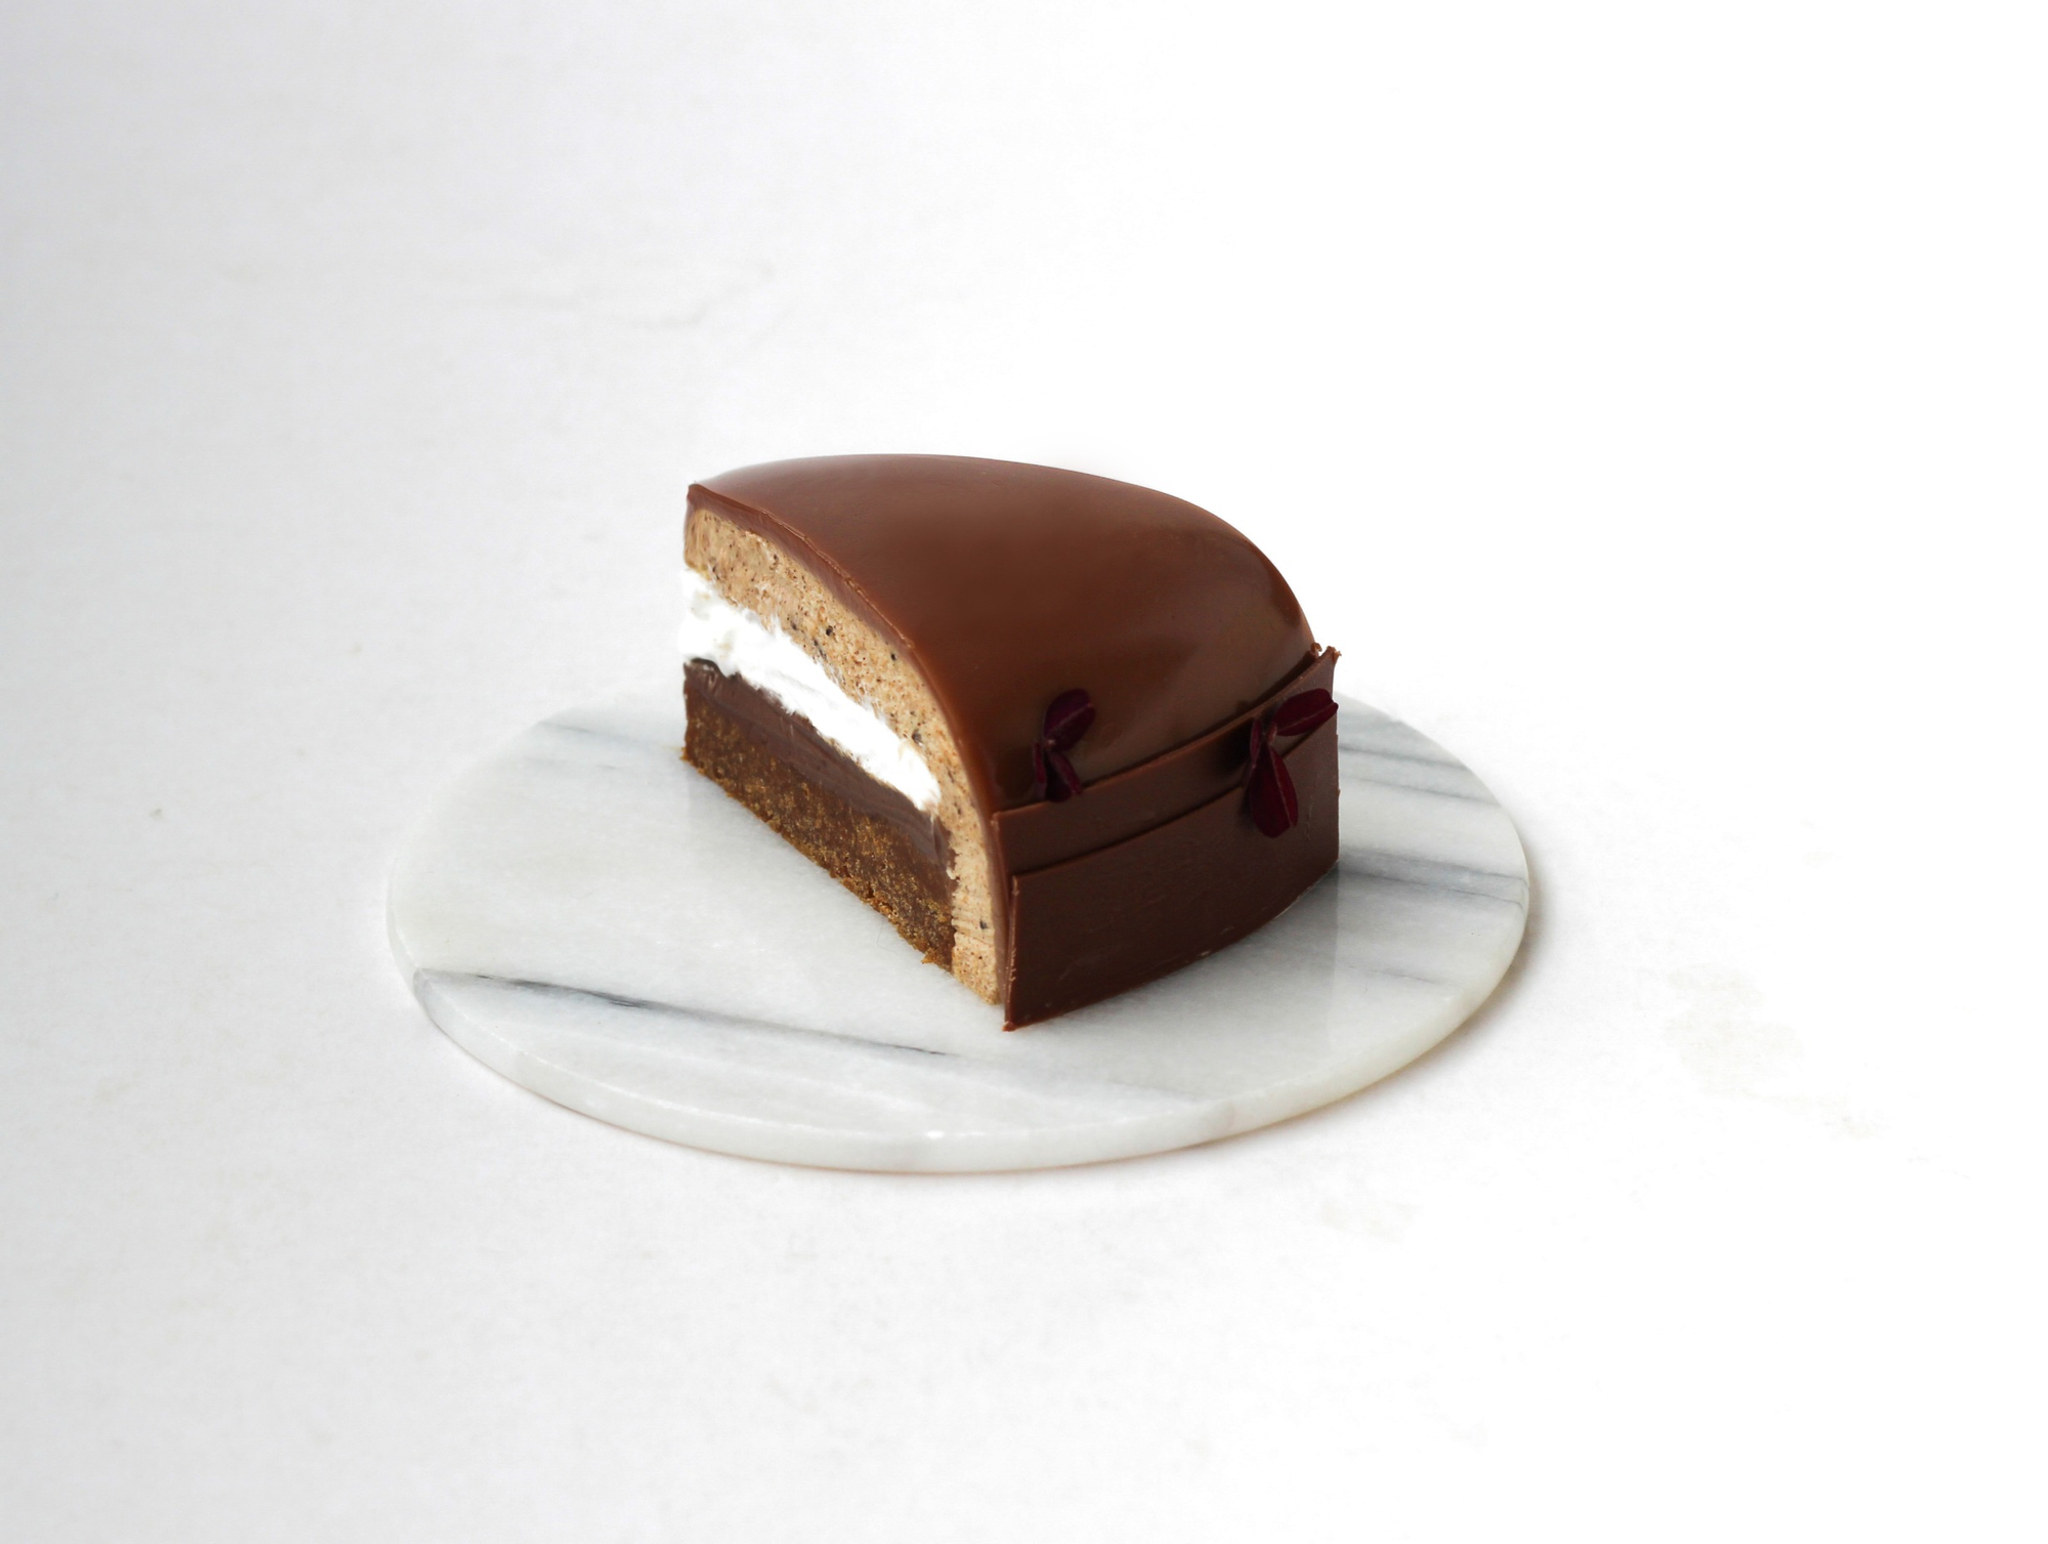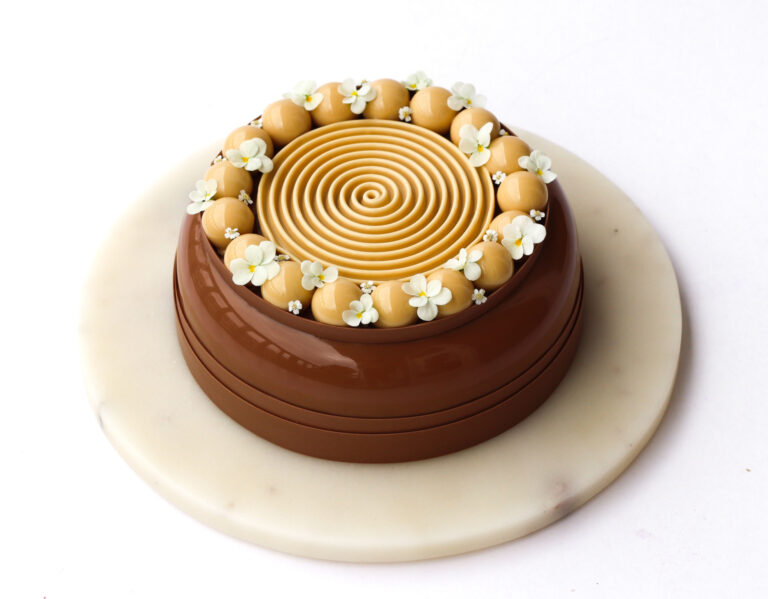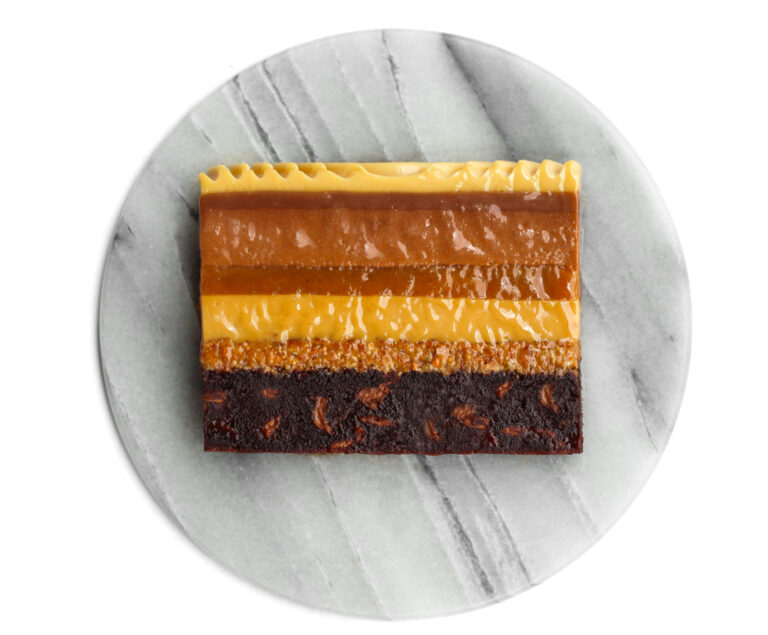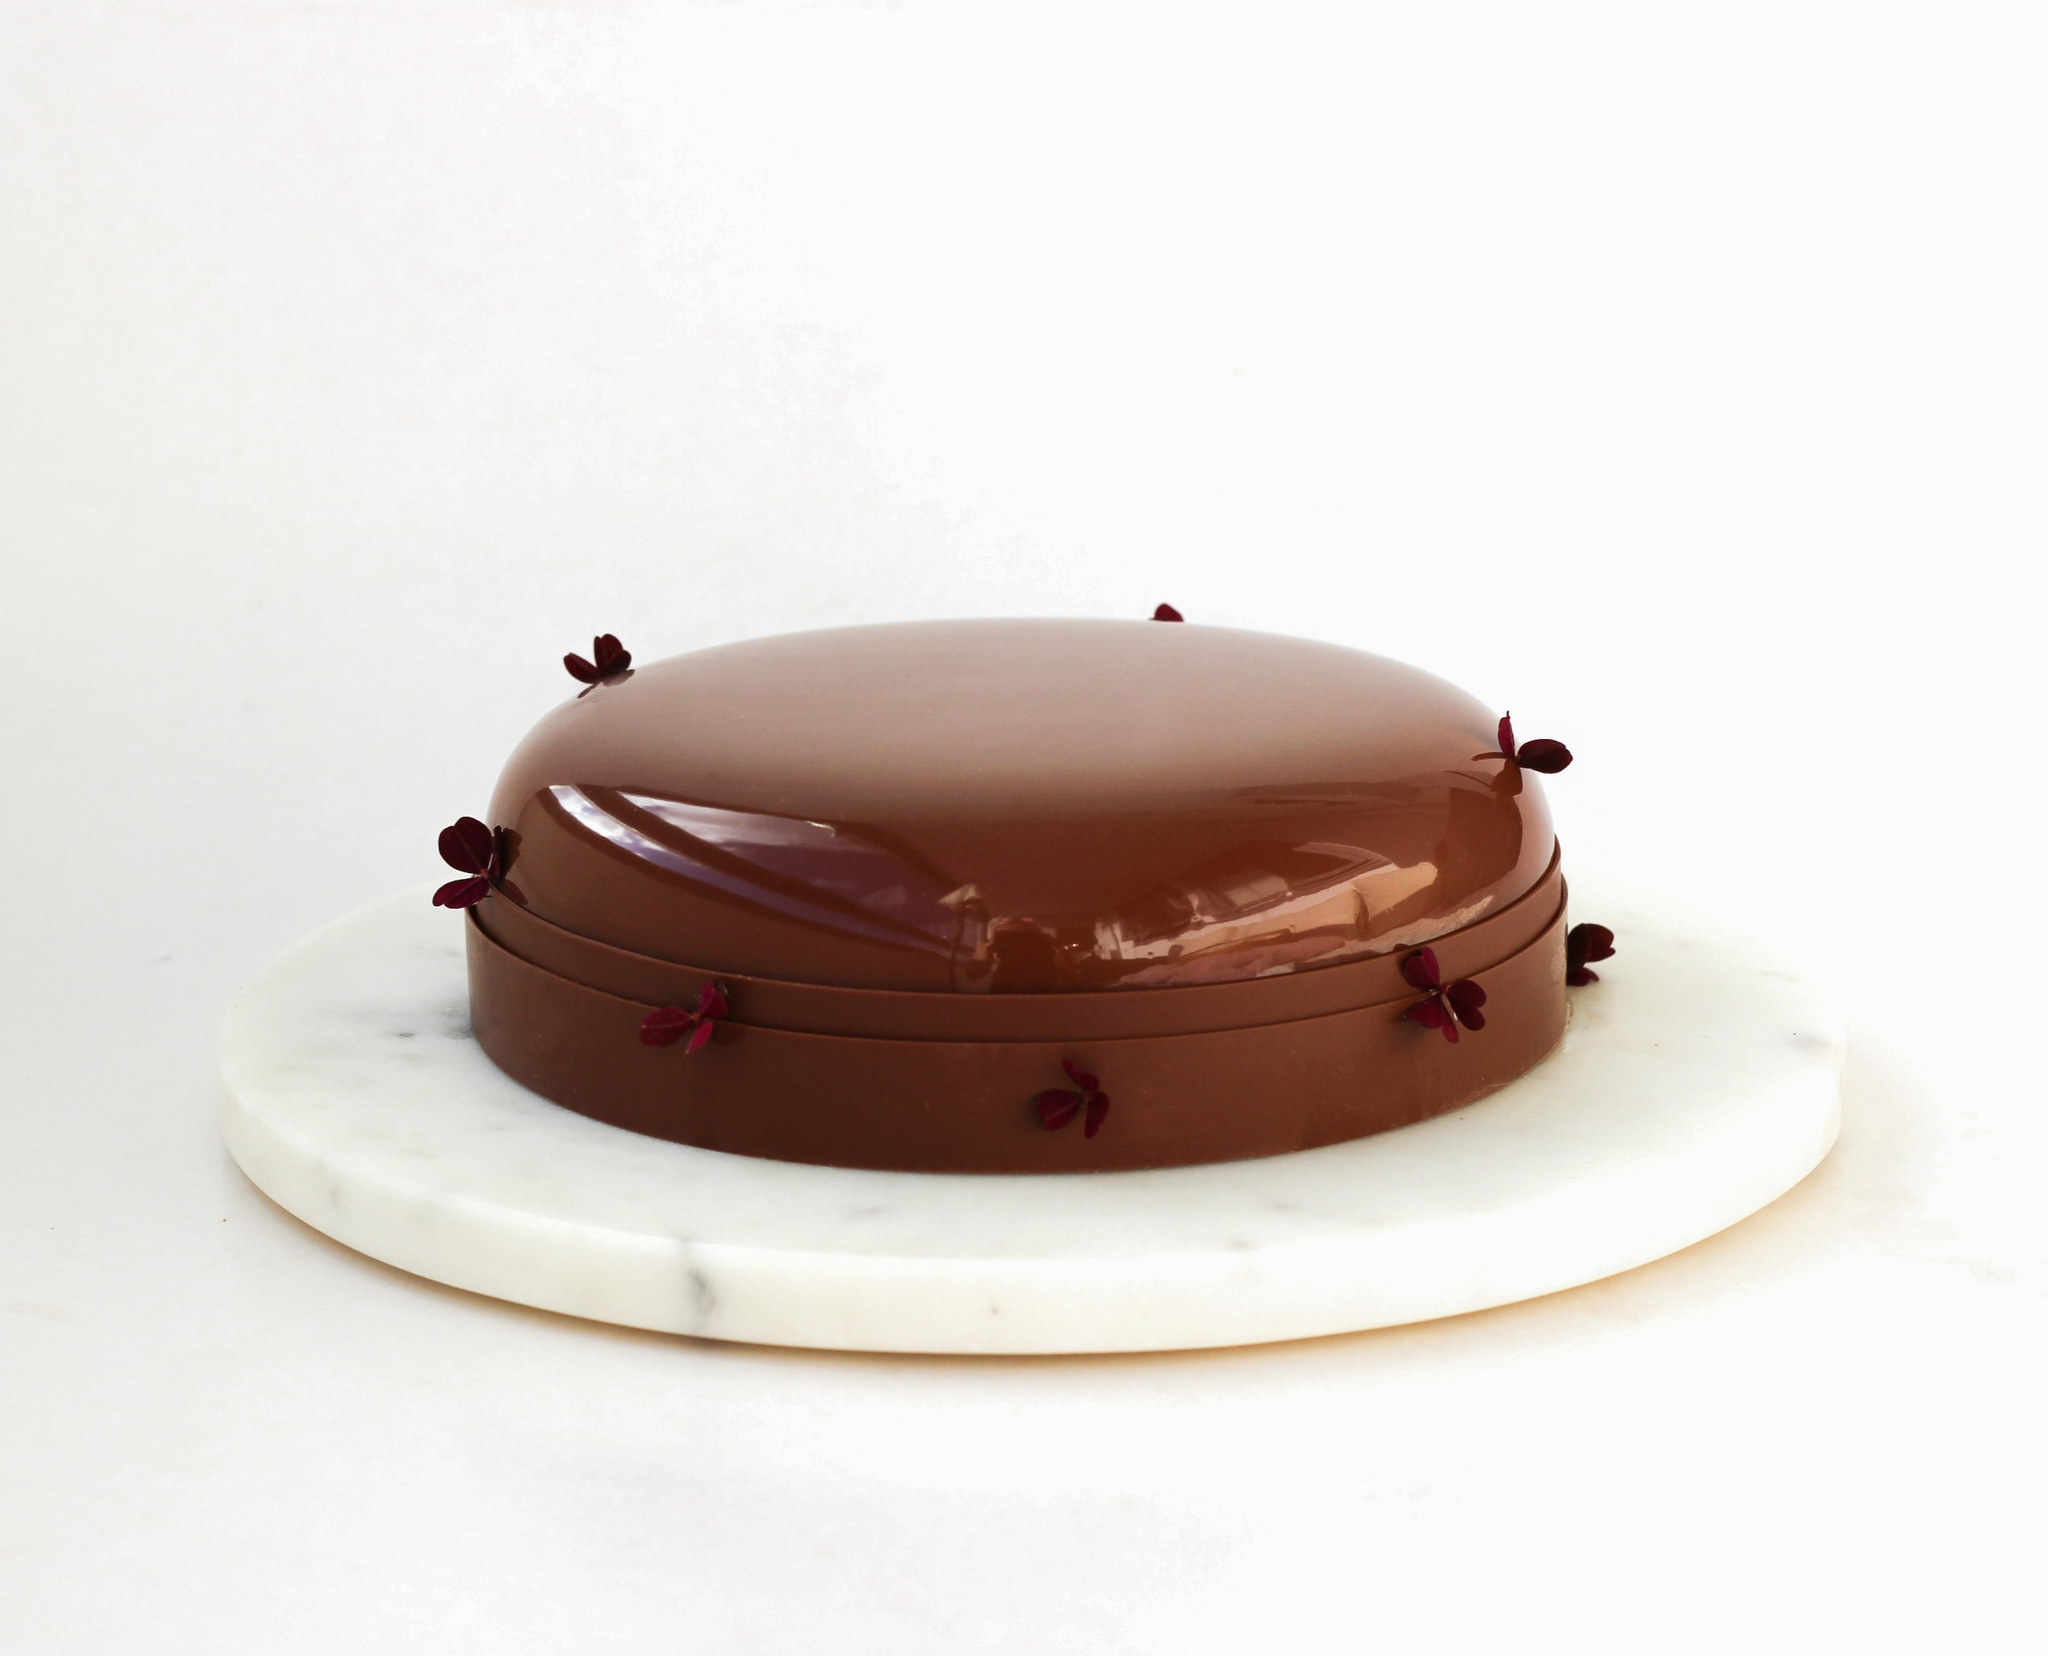
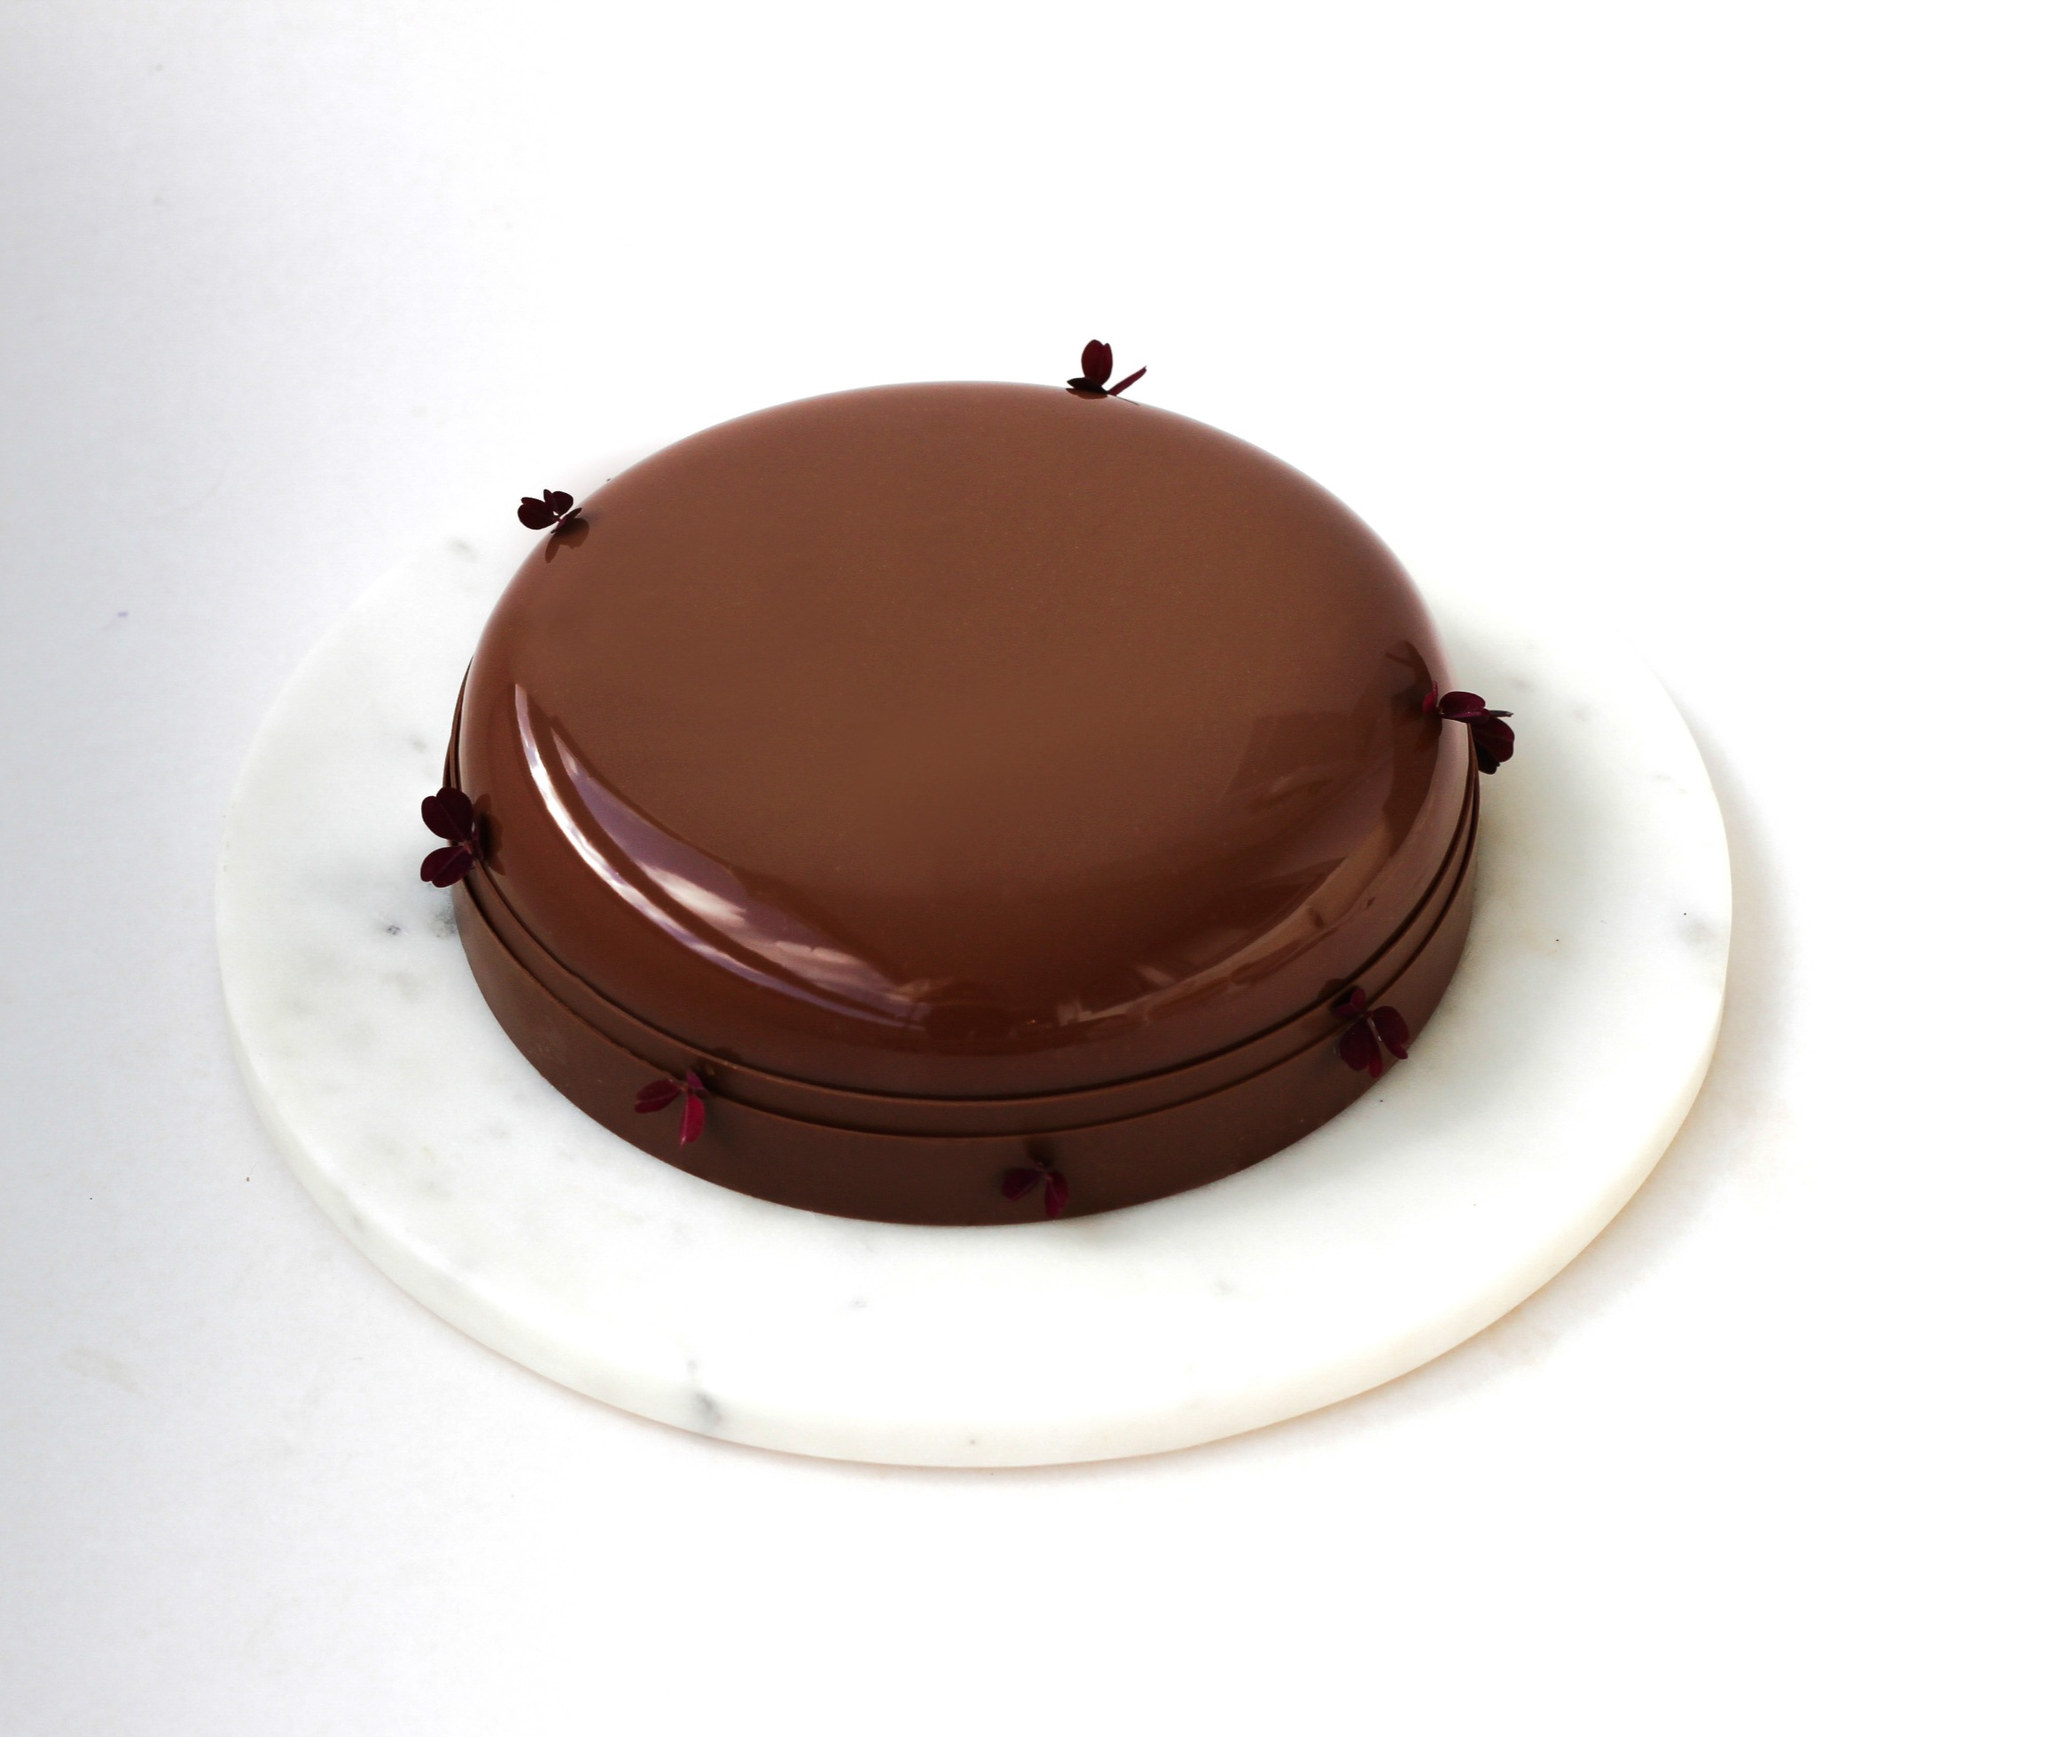
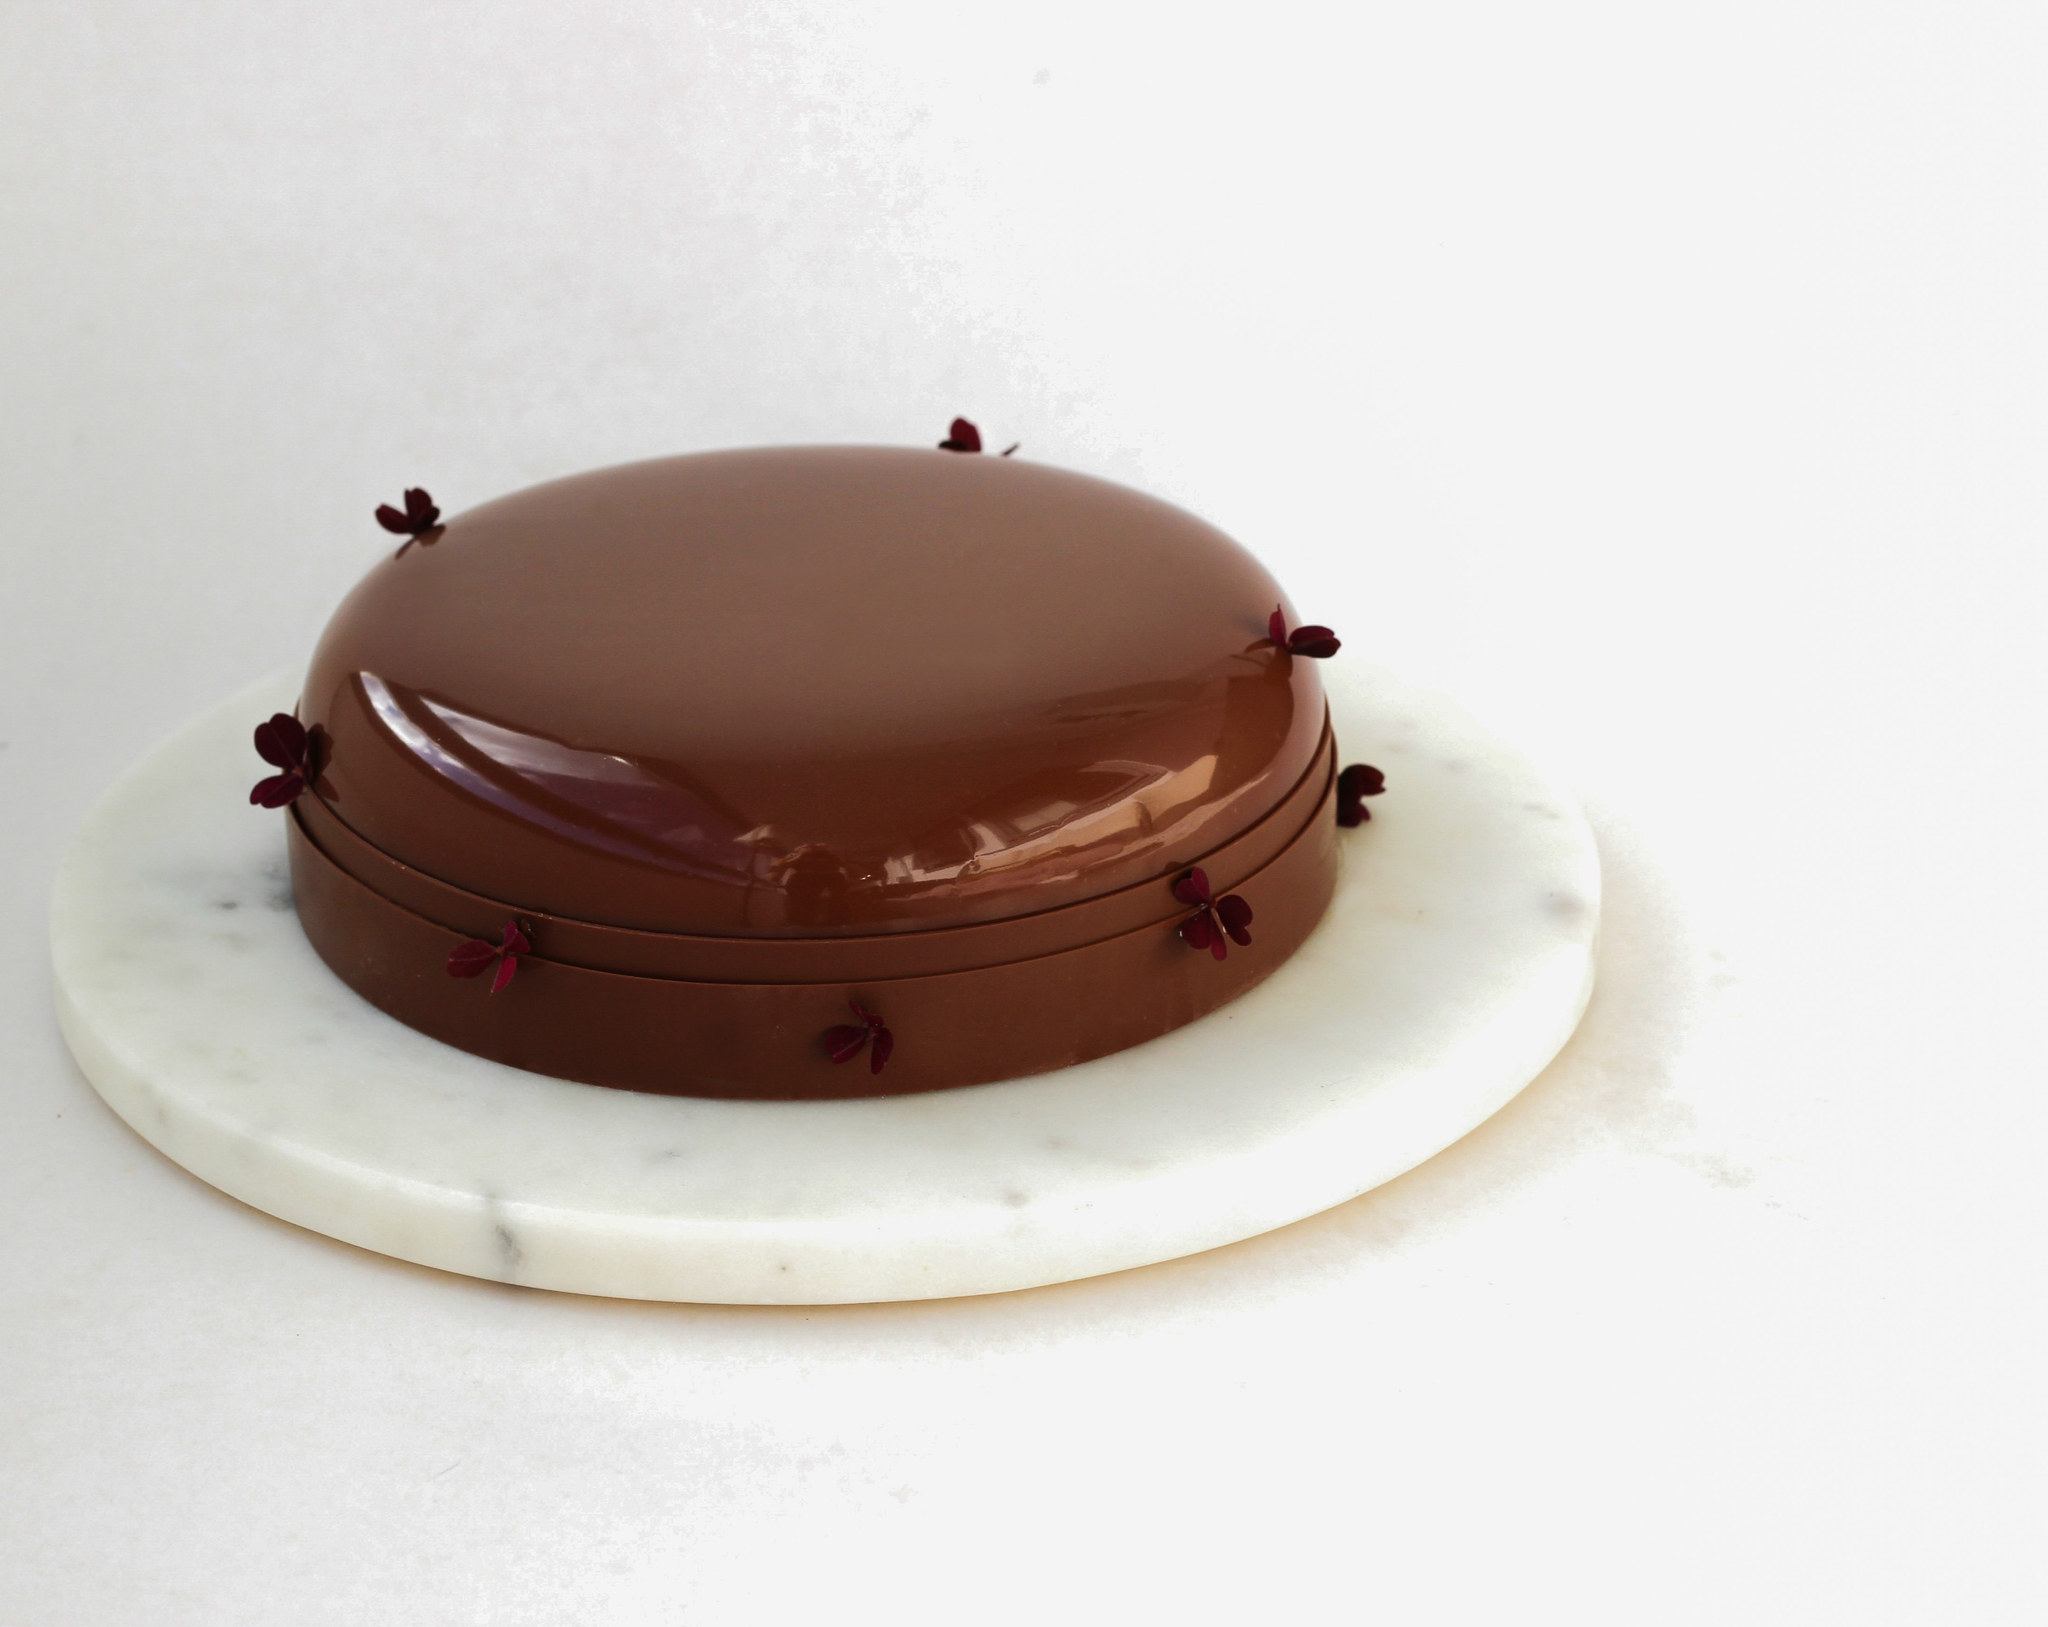
Chai Latte Cake with Chocolate & Marshmallow

This is one of my favorite cakes I’ve created, especially when it comes to the flavors. It simply tastes so good!

The combination of crunchy spiced biscuits, soft marshmallow, and chai latte brings together all the best flavors of autumn and winter in one cake. To me, it tastes almost like a mix between a hot cup of cocoa, a fudgy brownie, and a warm chai latte. It’s rich, cozy, and full of warming spices, making it the perfect cake to enjoy on a cold winter evening.

Definitely one I’ll be making again!

Happy baking <
Day 1

Chai Latte Spice Mix:

  • 4 tsp cinnamon
  • 2 tsp ground ginger
  • 1 tsp ground cloves
  • 1 tsp ground nutmeg
  • 1 tsp allspice
  • 0.25 tsp cardamom
  1. Mix all the ingredients together in an airtight container and set it aside until needed.

Day 1

Bastogne Biscuit Base:

  • 200 g Bastogne Cookies (or speculoos/spiced cookies/biscuits)
  • 100 g butter
  • 1 tsp chai latte spice (from the first step)
  • a pinch of salt
  1. Crush the cookies into crumbs by placing them in a freezer bag and pounding with a rolling pin, or blend them into crumbs in a mini food processor.
  2. Melt the butter and stir it together with the cookie crumbs, chai latte spice, and salt.
  3. Spread the cookie mixture into a cake ring (16 cm in diameter) lined with an acetate sheet and parchment paper at the bottom.
  4. Press the base evenly with a glass and place it in the freezer.

Day 1

Milk Chocolate Ganache:

  • 170 g milk chocolate (33%)
  • 75 ml heavy cream (min. 35%)
  1. Gently melt the chocolate (if necessary, over a double boiler) and set it aside in a bowl.
  2. Heat the heavy cream to a boil and pour it over the chocolate.
  3. Stir from the center of the mixture with a spatula until the ganache becomes glossy.
  4. Pour the ganache over the cookie base and return the cake to the freezer. The ganache must set before the next layer can be added.

Day 1

Vanilla Marshmallow Layer:

  • 75 g caster sugar
  • 40 g glucose syrup
  • 30 ml water
  • 1 tsp vanilla paste
  • 50 g egg whites (approx 1.5 egg whites)
  • 1 tbsp sugar
  • 70 g marshmallow

Since only half is needed for the cake, there will be leftovers. The recipe hasn’t been adjusted because it’s difficult to make meringue with smaller quantities than those listed, however, you can save it as a little snack or for another dessert.

  1. Beat the egg whites with 1 tbsp of sugar until light and fluffy, but not quite stiff.
  2. In a saucepan, heat the sugar (75 g), glucose syrup, vanilla paste, and water to 118°C / 244°F.
  3. Next, pour the hot sugar syrup into the egg whites in a thin stream down the side of the bowl while whisking (this is easiest with a stand mixer).
  4. Whisk until the meringue has cooled, is firm, and glossy.
  5. Cut 70 g of ready-made marshmallows into small cubes and fold them into the meringue.
  6. Spread half of the marshmallow layer on top of the ganache. Smooth the surface with a palette knife.
  7. Place the cake in the freezer overnight so it can set completely.

Day 2

Chai Latte Mousse:

  • 2 sheets of gelatin (1 sheet = 1.75 g, bloom value 240)
  • 160 g white chocolate (28%)
  • 350 ml heavy cream (min. 35%)
  • 3 tbsp chai latte spice (from the first step)
  1. Soak the gelatin in cold water for 5–10 minutes.
  2. Gently melt the white chocolate (if necessary, over a double boiler) and set the chocolate aside in a bowl.
  3. Heat 3 tbsp of the chai latte spice mix and 140 ml of heavy cream to a boil. Remove the saucepan from the heat and whisk in the gelatin.
  4. Pour the hot heavy cream over the chocolate while stirring in the center with a spatula until it comes together. Let the mixture cool until lukewarm.
  5. Whip the remaining heavy cream (210 ml) to soft peaks and fold it into the mixture that has cooled to lukewarm (if it’s too warm, it can cause the heavy cream to separate).
  6. Pour the mousse into an 18-cm-diameter silicone mold (I used a Silikomart Universo mold). If the mousse is a bit runny, let it set slightly in the refrigerator before adding the frozen cake. As a rule of thumb, it’s ready when you can dip the end of a spoon into the mousse and a soft peak forms when you lift it out.
  7. Remove the frozen cake from the freezer and place it into the chai latte mousse with the marshmallow layer facing down.
  8. Place the cake in the freezer overnight so it can set completely.

Day 3

Chocolate Glaze:

  • 6 gelatin sheets (10.5 g, bloom value 240)
  • 150 g milk chocolate (33%)
  • 110 ml heavy cream (min. 35%)
  • 50 g water
  • 140 g caster sugar
  • 150 g glucose syrup
  1. Soak the gelatin sheets in cold water for 5–10 minutes.
  2. Finely chop the chocolate and place it in a pitcher.
  3. Heat the sugar, water, heavy cream, and glucose syrup to a boil. Remove the pot from the heat and whisk in the gelatin.
  4. Pour the hot mixture over the chocolate in the pitcher. Blend with an immersion blender until the glaze comes together (hold the immersion blender at an angle to avoid air bubbles).
  5. Cover the glaze with plastic wrap and let it cool to 34-35°C / 93-95°F.
  6. Remove the frozen cake from the freezer just before glazing. Place the cake on a wire rack lined with parchment paper.
  7. Pour the glaze over the cake. Use a small palette knife to run along the bottom of the cake on the rack to remove any glaze strands.
  8. Place the cake on a cake plate and let it thaw in the refrigerator for about 6 hours.

Day 3

Decoration:

  • 160 g milk chocolate (33%)
  • sorrel (or other edible flowers)

Cut 2 acetate sheets to the following sizes:

  • Chocolate Ribbon 1: 2 cm x 58 cm
  • Chocolate Ribbon 2: 3 cm x 58 cm
  1. Place 2 cake rings (18 cm in diameter) in the refrigerator.
  2. Temper the chocolate.
  3. Pour the chocolate over the cut acetate sheets, smooth the surface with a small palette knife, peel the acetate sheet off the table, and run your fingers along the side of the acetate sheet to remove any chocolate residue. Let the chocolate set a little.
  4. When the chocolate has almost set, place the ribbons around the cold cake rings with the chocolate facing inward, and return them to the refrigerator. If the chocolate is too runny or hasn’t set, you won’t be able to remove it from the cake ring. So it’s important that the chocolate has almost set before you place the bands around the cake rings.
  5. Remove the acetate sheet once the chocolate has set.
  6. Place the two bands around the cake.
  7. Garnish with sorrel.

Cake Layer Overview:

Cake Base:
Bastogne Biscuit Base 15 minutes

Creamy Elements:
Milk Chocolate Ganache 15 minutes

Mousse:
Chai Latte Mousse 25 minutes Vanilla Marshmallow Layer 20 minutes

Decoration:
Chocolate Glaze 20 minutes

Yield & Time:

Servings / Yield: 8-10 slices

Total Active Working Time: 1 hour & 35 minutes
Approximate hands-on time only. Excludes weighing ingredients, baking, cooling, freezing, resting and assembly time, as well as the time required to prepare chocolate decorations.

This recipe may include affiliate links.

troubleshooting guide

Cake Base

Issue Cause Fix
  • Biscuit base is too crumbly
  • Not enough butter, crumbs too coarse, or crumbs blended too much into powder
  • Blend biscuits into fine crumbs (not dust) and mix thoroughly with melted butter
  • Biscuit base is too hard
  • Too much butter or base pressed too firmly
  • Measure butter accurately and press gently with the bottom of a glass
  • Biscuit base becomes greasy
  • Butter too hot or too much butter used
  • Let butter cool slightly before mixing and avoid adding extra butter

Creamy Element

Issue Cause Fix
  • Ganache is grainy
  • Chocolate was overheated or cream was too hot
  • Heat cream only to approx. 80-85°C
  • Before pouring the hot cream over the chocolate, it should cool to approximately 50–55°C
  • Pour gradually over finely melted chocolate and stir
  • Ganache separates
  • Emulsion (mixing heavy cream and chocolate) not formed due to temperature difference
  • Stir in the middle of the bowl using a spatula
  • Use an immersion blender if needed to restore texture
  • Ganache is thick
  • Ganache wasn’t hand blended
  • Use an immersion blender to fully emulsify the ganache and achieve a smooth, fluid texture
  • Ganache is too thin
  • Too much cream, or ganache still warm
  • Allow the ganache to cool in the fridge or freezer to thicken naturally.

Mousse & Cream

Issue Cause Fix
  • Mousse is runny
  • Gelatine not activated, not enough chilling time, too weak gelatin
  • Ensure gelatine is fully soaked and dissolved; chill mousse thoroughly before unmolding, ensure bloom value matches recipe
  • Whipped cream too soft
  • Whip cream to soft peaks, but not too loose
  • Mousse is grainy or seized
  • Chocolate or cream overheated
  • Let ganache cool to 29–33°C before folding in whipped cream
  • Cream added too quickly or too cold
  • Temper mixture gently, fold in cream in 2–3 batches
  • Whipped cream overwhipped
  • Only whip to soft peaks
  • Overmixing after folding
  • Fold just until incorporated, do not stir aggressively
  • Mousse collapsed after assembly
  • Mousse not set before layering
  • Allow mousse to partially set in mold before adding cake or inserts
  • Insert (e.g., cake layer) pushed down too hard
  • Gently place insert, don't press down
  • Mousse is too firm / rubbery
  • Too much gelatine
  • Reduce gelatine or use a more precise scale
  • Gelatine not evenly dispersed
  • Fully melt and strain gelatine mixture before adding to ganache
  • Mousse has air bubbles / holes
  • Folding too aggressively or too fast
  • Fold gently and slowly to preserve even texture
  • Not tapping the mold after filling
  • Lightly tap the mold on the counter to remove air pockets
  • Mousse stuck to mold or cracked when unmolding
  • Unmolded too early or mold not properly prepared
  • Freeze until completely set
Issue Cause Fix
  • Fluff is runny
  • Sugar syrup not cooked to the correct temperature
  • Cook syrup to 118°C / 244°F
  • Egg whites not whipped to soft peaks before adding syrup
  • Whip egg whites to soft peaks before adding syrup
  • Fluff not whipped until fully cooled and firm
  • Whip until the fluff is firm, glossy, and cooled
  • Fluff is grainy
  • Sugar crystallization during syrup cooking
  • Avoid stirring once the syrup starts boiling
  • Sugar crystals on the sides of the pot
  • Brush down sugar crystals on the pot sides with water while heating
  • Fluff is dense or heavy
  • Egg whites not whipped enough before syrup addition
  • Whip whites to soft peaks before adding syrup
  • Syrup poured in too quickly
  • Pour syrup in a thin, steady stream while whisking continuously
  • Fluff deflates after whipping
  • Fluff not whipped long enough to cool and stabilize
  • Keep whipping until the bowl feels less warm and the fluff holds firm peaks
  • Sugar syrup too hot
  • Cook syrup to 118°C / 244°F
  • Fluff looks curdled or uneven
  • Syrup added too fast or in one spot
  • Pour syrup slowly down the side of the bowl in a thin stream
  • Fluff becomes too stiff and hard to pipe
  • Fluff sat too long before piping
  • Transfer to piping bag and use soon after making
  • Fluff cooled and set in the piping bag
  • Knead the piping bag briefly to soften before piping
  • Fluff layer smears into other layers
  • Previous layer not set before piping
  • Freeze or chill the previous layer until set before piping
  • Fluff pressed too hard while leveling
  • Level gently with minimal pressure
  • Fluff is too thin
  • Wish fluff until it has the right consistency

Decoration

Issue Cause Fix
  • Glaze is too thick
  • Temperature too low or glucose syrup too viscous
  • Reheat gently to 34–35°C
  • Use a medium-viscosity glucose syrup
  • Glaze is too thin and won’t stick
  • Too hot, wrong gelatin ratio, or cake not frozen
  • Cool glaze to 34–35°C before pouring
  • Ensure cake is fully frozen
  • Glaze has bubbles
  • Overmixing or improper blender
  • Use immersion blender with open-head design
  • Avoid over-stirring when cooling
  • Glaze looks dull
  • Temperature too low or poor ingredient ratios
  • Pour at correct temp (34–35°C)
  • Use proper gelatin-to-liquid ratio
  • Glaze is shiny first but turns dull later
  • Glaze applied too cold or syrup was too thick
  • Apply at proper temp
  • Use the right glucose syrup texture
  • Glaze is too transparent
  • Glaze too hot
  • Cool to correct temp before pouring

shopping list

Dairy & Eggs

Chocolate & Confectionery

Fruit & Fresh

Baking & Dry Ingredients

Other

Scroll to Top